
Extending SaaS Applications
Introduction & Overview
Subscribers (customers) of SaaS solutions frequently need to tailor these to their specific needs, for example, by adding specific extension fields and entities. All CAP-based applications intrinsically support such SaaS extensions out of the box.
The overall process is depicted in the following figure:

In this guide, you will learn the following:
- How to enable extensibility as a SaaS provider.
- How to develop SaaS extensions as a SaaS customer.
Prerequisites
Before we start, you'll need a CAP-based multitenant SaaS application that you can modify and deploy.
Jumpstart
You can download the ready-to-use Orders Management application:
git clone https://github.com/capire/orders
cd orders
cds add multitenancy
Also, ensure you have the latest version of @sap/cds-dk installed globally:
npm update -g @sap/cds-dkAs a SaaS Provider
CAP provides intrinsic extensibility, which means all your entities and services are extensible by default.
Your SaaS app becomes the base app for extensions by your customers, and your data model the base model.
1. Enable Extensibility
Extensibility is enabled by running this command in your project root:
cds add extensibilityEssentially, this automates the following steps…
- It adds an
@sap/cds-mtxspackage dependency:
npm add @sap/cds-mtxs- It switches on cds.requires.extensibility: true in your package.json:
{
  "name": "@capire/orders",
  "version": "1.0.0",
  "dependencies": {
    "@capire/common": "*",
    "@sap/cds": "^10",
    "@sap/cds-mtxs": "^4"
  },
  "cds": {
    "requires": {
      "extensibility": true
    }
  }
}
If @sap/cds-mtxs is newly added to your project install the dependencies:
npm i2. Restrict Extension Points
Normally, you'll want to restrict which services or entities your SaaS customers are allowed to extend and to what degree they may do so. Take a look at the following configuration:
{
  "cds": {
    "requires": {
      "cds.xt.ExtensibilityService": {
        "element-prefix": ["x_"],
        "extension-allowlist": [
          {
            "for": ["sap.capire.orders"],
            "kind": "entity",
            "new-fields": 2
          },
          {
            "for": ["OrdersService"],
            "new-entities": 2
          }
        ]
      }
    }
  }
}
This enforces the following restrictions:
- All new elements have to start with
x_→ to avoid naming conflicts. - Only entities in namespace
sap.capire.orderscan be extended, with a maximum 2 new fields allowed. - Only the
OrdersServicecan be extended, with a maximum of 2 new entities allowed.
Learn more about extension restrictions.
3. Provide Template Projects
To jumpstart your customers with extension projects, it's beneficial to provide a template project. Including this template with your application and making it available as a downloadable archive not only simplifies their work but also enhances their experience.
Create an Extension Project (Template)
Extension projects are standard CAP projects extending the SaaS application. Create one for your SaaS app following these steps:
Create a new CAP project —
orders-extin our walkthrough:shcd .. cds init orders-ext --nodejs code orders-ext # open in VS CodeAdd this to your package.json:
jsonc{ "name": "@capire/orders-ext", "extends": "@capire/orders", "workspaces": [ ".base" ] }
nameidentifies the extension within a SaaS subscription; extension developers can choose the value freely.extendsis the name by which the extension model will refer to the base model. This must be a valid npm package name as it will be used bycds pullas a package name for the base model. It doesn't have to be a unique name, nor does it have to exist in a package registry like npmjs, as it will only be used locally.workspacesis a list of folders including the one where the base model is stored.cds pullwill add this property automatically if not already present.
Uniqueness of base-model name…
You use the extends property as the name of the base model in your extension project. Currently, it's not an issue if the base model name isn't unique. However, to prevent potential conflicts, we recommend using a unique name for the base model.
Add Sample Content
Create a new file app/extensions.cds and fill in this content:
namespace x_orders.ext; // only applies to new entities defined below
using { OrdersService, sap.capire.orders.Orders } from '@capire/orders';

extend Orders with {
  x_new_field : String;
}

// -------------------------------------------
// Fiori Annotations

annotate Orders:x_new_field with @title: 'New Field';
annotate OrdersService.Orders with @UI.LineItem: [
  ... up to { Value: OrderNo },
  { Value : x_new_field },
  ...
];
The name of the .cds file can be freely chosen. Yet, for the build system to work out of the box, it must be in either the app, srv, or db folder.
Keep it simple
We recommend putting all extension files into ./app and removing ./srv and ./db from extension projects.
You may want to consider separating concerns by putting all Fiori annotations into a separate ./app/fiori.cds.
Add Test Data
To support quick-turnaround tests of extensions using cds watch, add some test data. In your template project, create a file test/data/sap.capire.orders-Orders.csv like that:
ID,createdAt,buyer,OrderNo,currency_code
7e2f2640-6866-4dcf-8f4d-3027aa831cad,2019-01-31,john.doe@test.com,1,EUR
64e718c9-ff99-47f1-8ca3-950c850777d4,2019-01-30,jane.doe@test.com,2,EUR
Add a Readme
Include additional documentation for the extension developer in a README.md file inside the template project.
# Getting Started

Welcome to your extension project to  `@capire/orders`.

It contains these folders and files, following our recommended project layout:

| File or Folder | Purpose                        |
|----------------|--------------------------------|
| `app/`         | all extensions content is here |
| `test/`        | all test content is here       |
| `package.json` | project configuration          |
| `readme.md`    | this getting started guide     |


## Next Steps

- `cds pull` the latest models from the SaaS application
- edit [`./app/extensions.cds`](./app/extensions.cds) to add your extensions
- `cds watch` your extension in local test-drives
- `cds push` your extension to **test** tenant
- `cds push` your extension to **prod** tenant


## Learn More

Learn more at https://cap.cloud.sap/docs/guides/extensibility/customization.
4. Provide Extension Guides
You should provide documentation to guide your customers through the steps to add extensions. This guide should provide application-specific information along the lines of the walkthrough steps presented in this guide.
Here's a rough checklist what this guide should cover:
- How to set up test tenants for extension projects
- How to assign requisite roles to extension developers
- How to start extension projects from provided templates
- How to find deployed app urls of test and prod tenants
- What can be extended? → which services, entities, ...
- With enclosed documentation to the models for these services and entities.
5. Deploy Application
Before deploying your SaaS application to the cloud, you can test-drive it locally. Prepare this by going back to your app with cd orders.
With your application enabled and prepared for extensibility, you are ready to deploy the application as described in the Deployment Guide.
As a SaaS Customer
The following sections provide step-by-step instructions on adding extensions. All steps are based on our Orders Management sample which can be started locally for testing.
On BTP…
To extend a SaaS app deployed to BTP, you'll need to subscribe to it through the BTP cockpit.
Refer to the Deployment Guide for more details on remote deployments.
Also, you have to replace local URLs used in cds commands later with the URL of the deployed App Router. Use a passcode to authenticate and authorize you. Refer to the section on cds login for a simplified workflow.
1. Subscribe to SaaS App
It all starts with a customer subscribing to a SaaS application. In a productive application this is usually triggered by the platform to which the customer is logged on. The platform is using a technical user to call the application subscription API. In your local setup, you can simulate this with a mock user yves.
In a new terminal, subscribe as tenant
t1:shcds subscribe t1 --to http://localhost:4005 -u yves:
Please note that the URL used for the subscription command is the sidecar URL, if a sidecar is used. Learn more about tenant subscriptions via the MTX API for local testing.
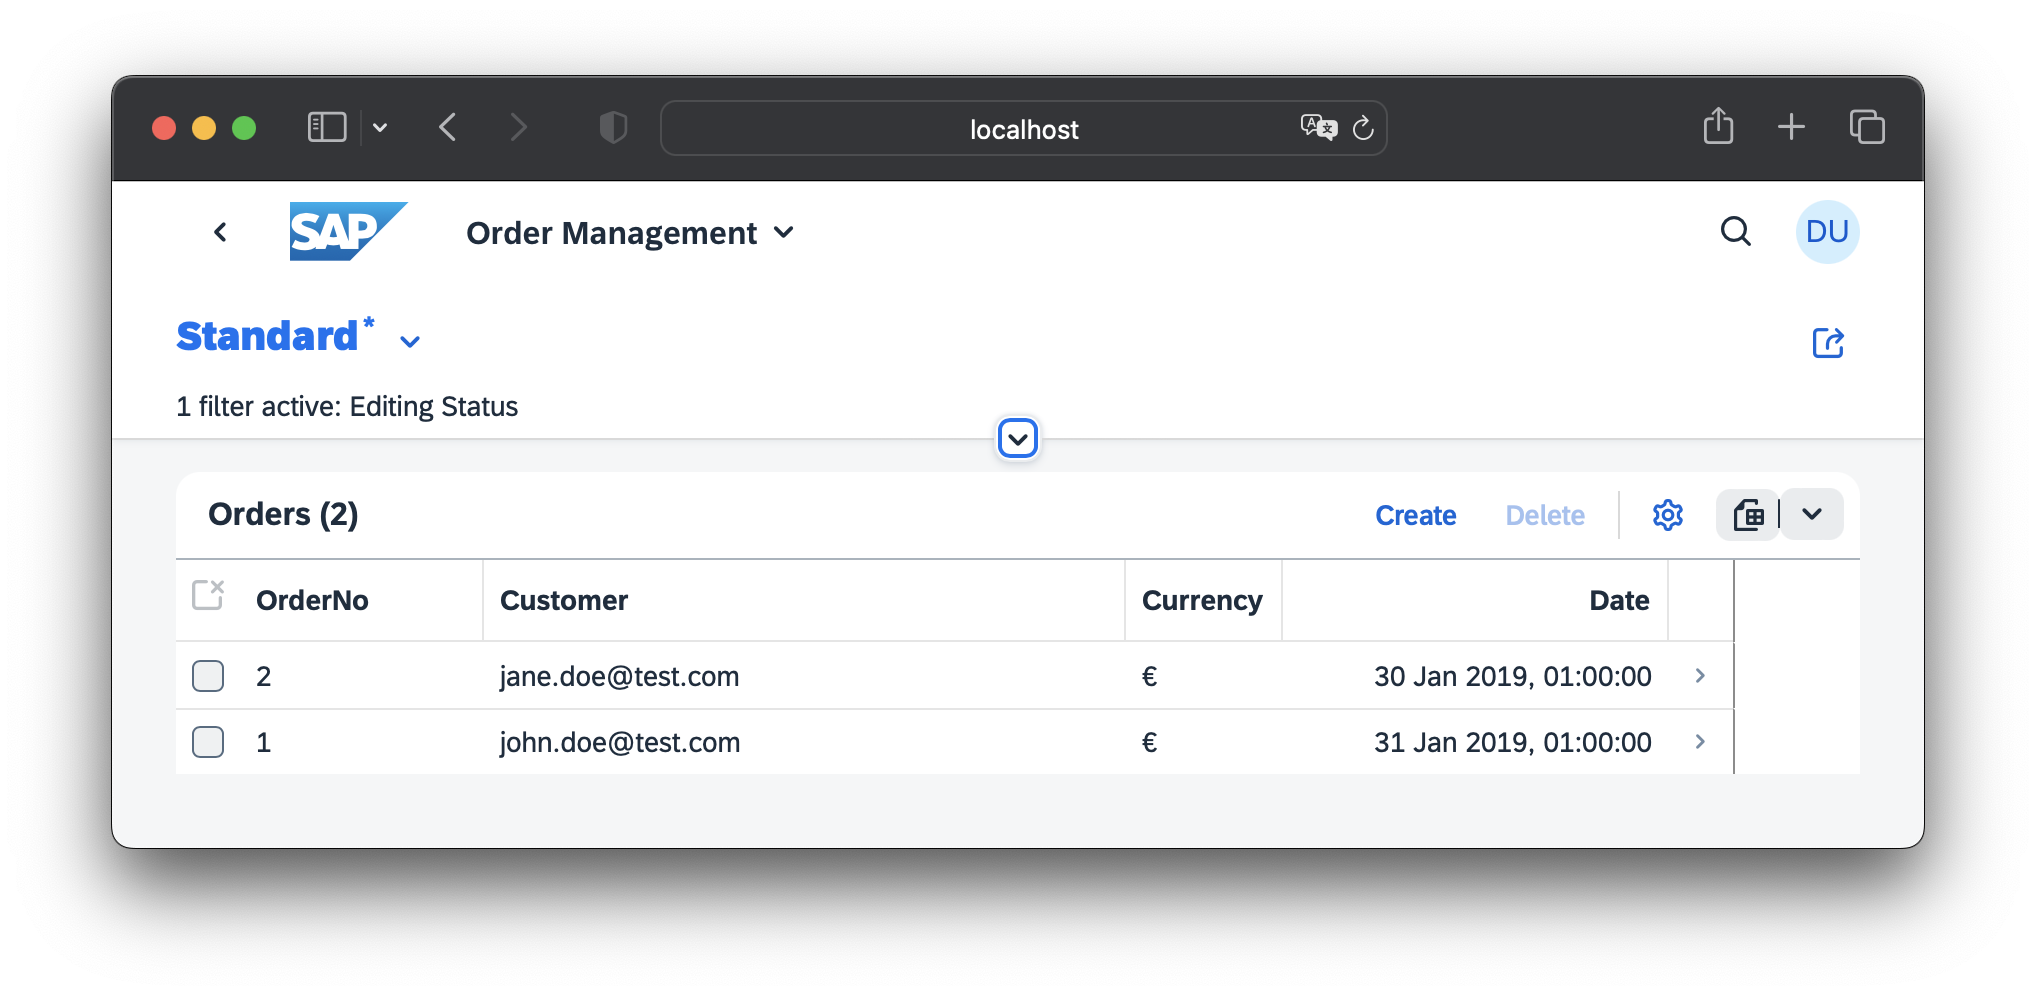
- Verify that it worked by opening the Orders Management Fiori UI in a new private browser window and log in as
carol, which is assigned to tenantt1.
2. Prepare an Extension Tenant
In order to test-drive and validate the extension before activating to production, you'll first need to set up a test tenant. This is how you simulate it in your local setup:
Set up a test tenant
t1-extshcds subscribe t1-ext --to http://localhost:4005 -u yves:Assign extension developers for the test tenant.
As you're using mocked auth, simulate this step by adding the following to the SaaS app's package.json, assigning user
bobas extension developer for tenantt1-ext:
{
  "cds": {
    "requires": {
      "auth": {
        "users": {
          "bob": {
            "tenant": "t1-ext",
            "roles": ["cds.ExtensionDeveloper"]
          }
        }
      }
    }
  }
}
3. Start an Extension Project
Extension projects are standard CAP projects extending the subscribed application. SaaS providers usually provide application-specific templates, which extension developers can download and open in their editor.
You can therefore use the extension template created in your walkthrough as SaaS provider. Open the orders-ext folder in your editor. Here's how you do it using VS Code:
code ../orders-ext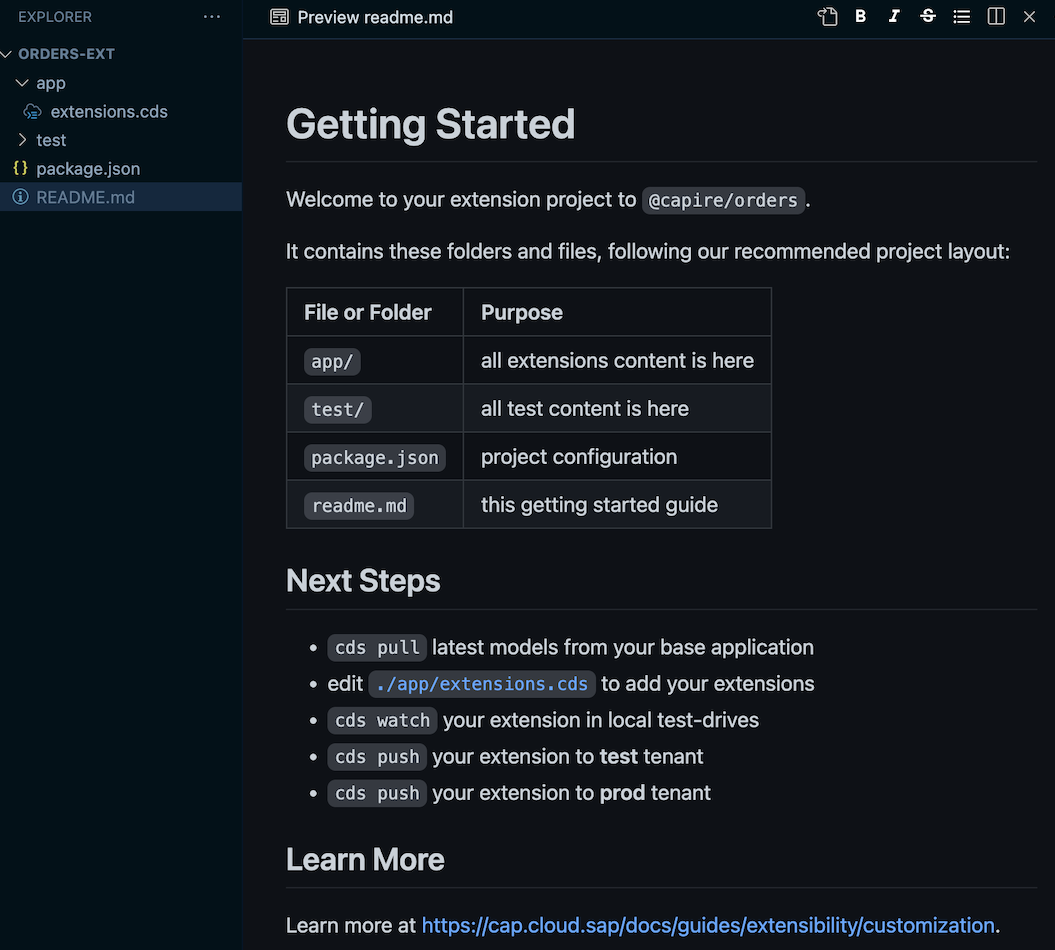
4. Pull the Latest Base Model
Next, you need to download the latest base model.
cds pull --from http://localhost:4005 -u bob:Run
cds help pullto see all available options.
This downloads the base model as a package into an npm workspace folder .base. The actual folder name is taken from the workspaces configuration. It also prepares the extension package.json to reference the base model, if the extension template does not already do so.
See what cds pull does…
Gets the base-model name from the extension package.json, property
extends.If the previous value is not a valid npm package name, it gets changed to
"base-model". In this case, existing source files may have to be manually adapted.cds pullwill notify you in such cases.It fetches the base model from the SaaS app.
It saves the base model in a subdirectory
.baseof the extension project.This includes file .base/package.json describing the base model as an npm package, including a
"name"property set to the base-model name.In the extension package.json:
- It configures
.baseas an npm workspace folder. - It sets the
extendsproperty to the base-model name.
- It configures
5. Install the Base Model
To make the downloaded base model ready for use in your extension project, install it as a package:
npm installThis will link the base model in the workspace folder to the subdirectory node_modules/@capire/orders (in this example).
6. Write the Extension
Edit the file app/extensions.cds and replace its content with the following:
namespace x_orders.ext; // for new entities like SalesRegion below
using { OrdersService, sap, sap.capire.orders.Orders } from '@capire/orders';

extend Orders with { // 2 new fields....
  x_priority    : String enum {high; medium; low} default 'medium';
  x_salesRegion : Association to x_SalesRegion;
}

entity x_SalesRegion : sap.common.CodeList { // Value Help
  key code : String(11);
}


// -------------------------------------------
// Fiori Annotations

annotate Orders:x_priority with @title: 'Priority';
annotate x_SalesRegion:name with @title: 'Sales Region';

annotate OrdersService.Orders with @UI.LineItem: [
  ... up to { Value: OrderNo },
  { Value: x_priority },
  { Value: x_salesRegion.name },
  ...
];
Learn more about what you can do in CDS extension models
Tip
Make sure no syntax errors are shown in the CDS editor before going on to the next steps.
7. Test-Drive Locally
To conduct an initial test of your extension, run it locally with cds watch:
cds watch --port 4006This starts a local Node.js application server serving your extension along with the base model and supplied test data stored in an in-memory database.
It does not include any custom application logic though.
Add Local Test Data
To improve local test drives, you can add local test data for extensions.
Edit the template-provided file test/data/sap.capire.orders-Orders.csv and add data for the new fields as follows:
ID,createdAt,buyer,OrderNo,currency_code,x_priority,x_salesRegion_code
7e2f2640-6866-4dcf-8f4d-3027aa831cad,2019-01-31,john.doe@test.com,1,EUR,high,EMEA
64e718c9-ff99-47f1-8ca3-950c850777d4,2019-01-30,jane.doe@test.com,2,EUR,low,APJ
Create a new file test/data/x_orders.ext-x_SalesRegion.csv with this content:
code,name,descr
AMER,"Americas","North, Central and South America"
EMEA,"Europe, the Middle East and Africa","Europe, the Middle East and Africa"
APJ,"Asia Pacific and Japan","Asia Pacific and Japan"
Verify the Extension
Verify your extensions are applied correctly by opening the Orders Fiori Preview in a new private browser window, log in as bob, and see columns Priority and Sales Region filled as in the following screenshot:
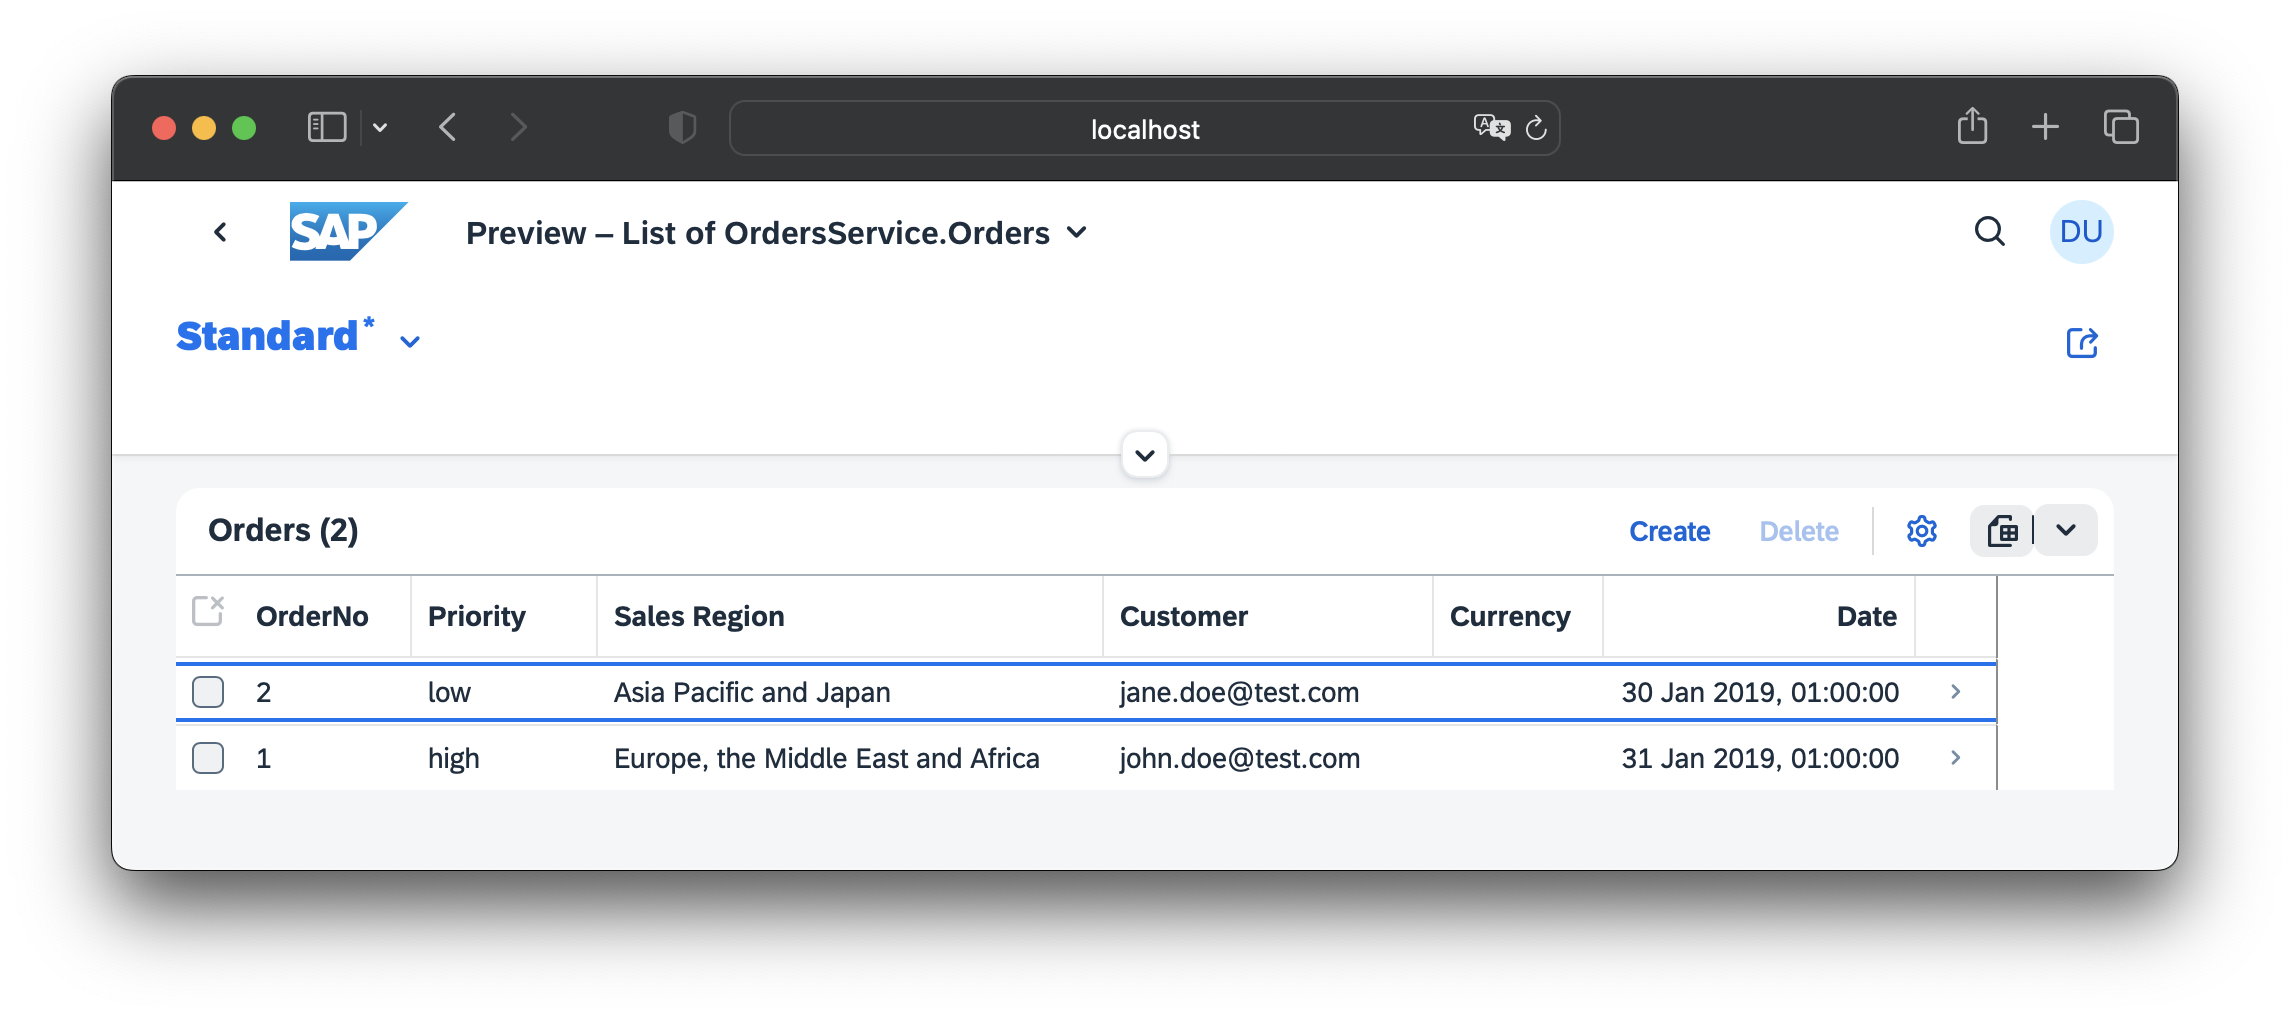
Note: the screenshot includes local test data, added as explained below.
This test data will only be deployed to the local sandbox and not be processed during activation to the productive environment.
8. Push to Test Tenant
Let's push your extension to the deployed application in your test tenant for final verification before pushing to production.
cds push --to http://localhost:4005 -u bob:Tip
cds push runs a cds build on your extension project automatically.
Prepacked extensions
To push a ready-to-use extension archive (.tar.gz or .tgz), run cds push <archive or URL>. The argument can be a local path to the archive or a URL to download it from. Run cds help push to see all available options.
You pushed the extension with user
bob, which in your local setup ensures they are sent to your test tenantt1-ext, not the production tenantt1.
Building extensions
cds build compiles the extension model and validates the constraints defined by the SaaS application, for example, it checks if the entities are extendable. It will fail in case of compilation or validation errors, which will in turn abort cds push.
Warning messages related to the SaaS application base model are reclassified as info messages. As a consequence they will not be shown by default. Execute cds build --log-level info to display all messages, although they should not be of interest for the extension developer.
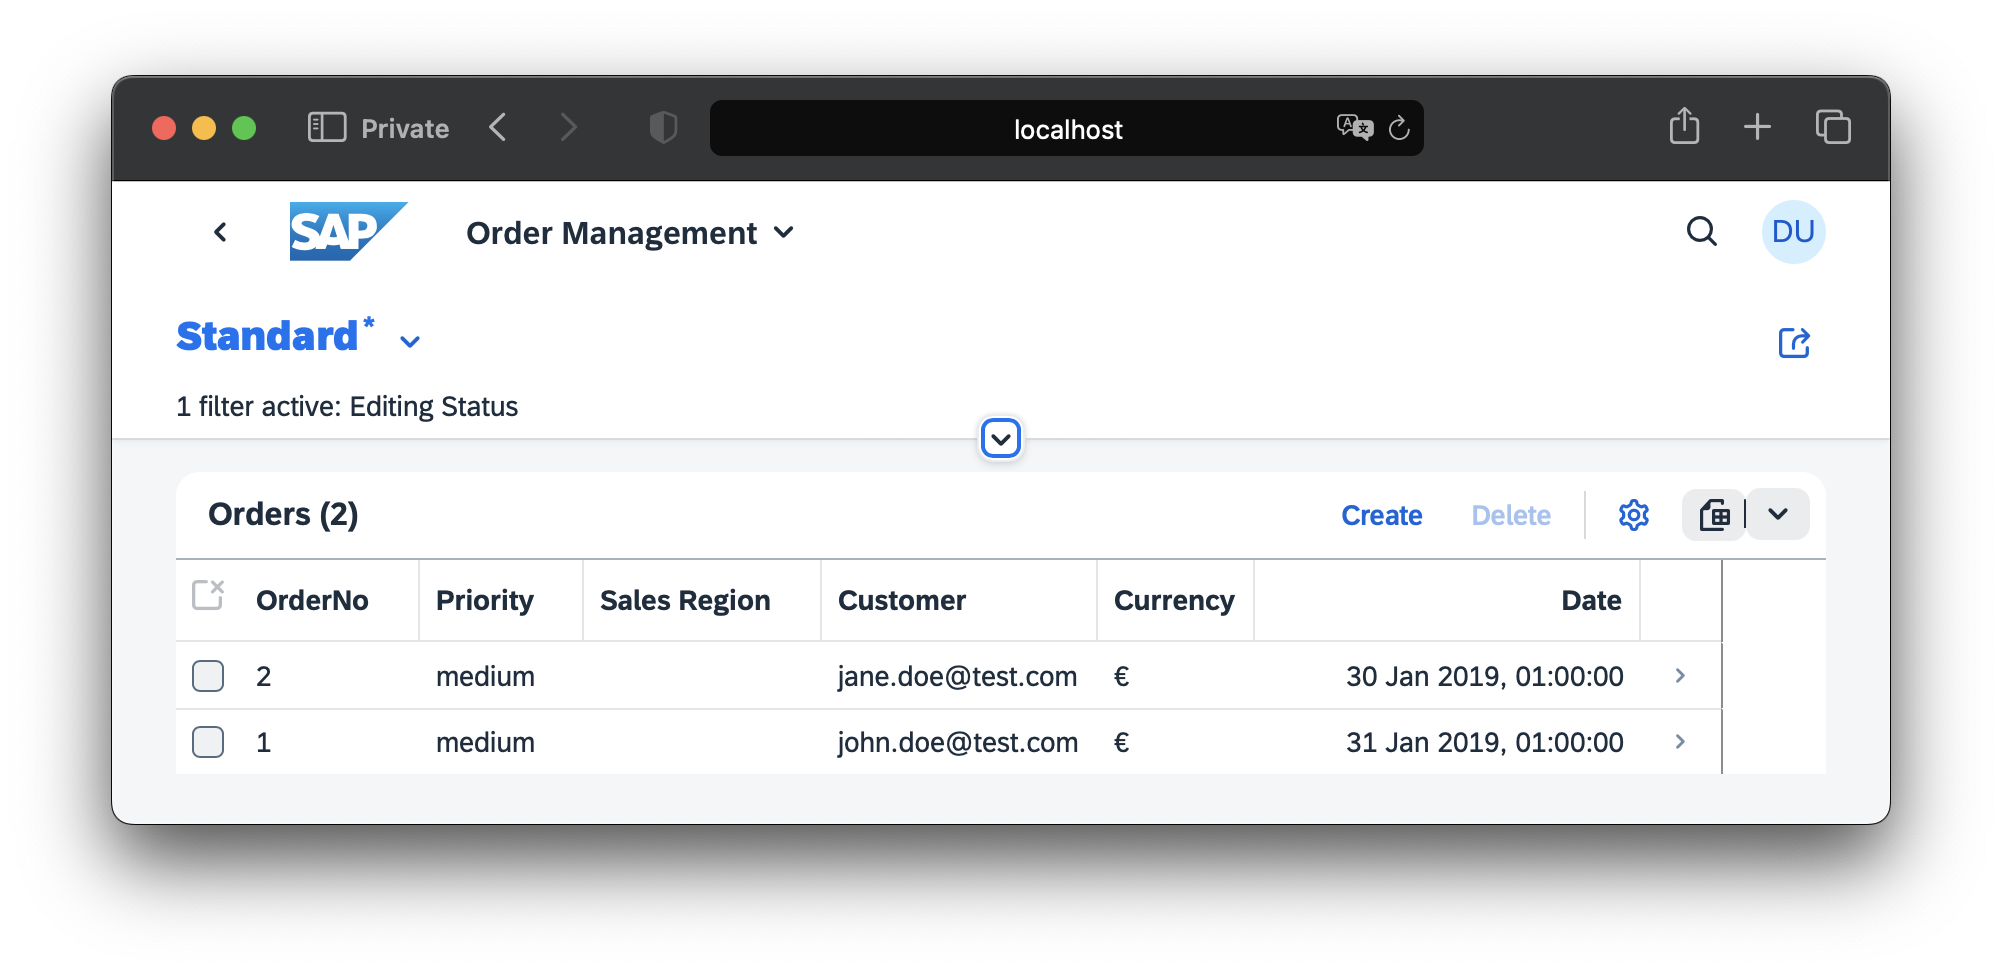
Verify the Extension
Verify your extensions are applied correctly by opening the Order Management UI in a new private browser window, log in as bob, and check that columns Priority and Sales Region are displayed as in the following screenshot. Also, check that there's content with a proper label in the Sales Region column.
9. Add Data
After pushing your extension, you have seen that the column for Sales Region was added, but is not filled. To change this, you need to provide initial data with your extension. Copy the data file that you created before from test/data/ to db/data/ and push the extension again.
Learn more about adding data to extensions
10. Activate the Extension
Finally, after all tests, verifications and approvals are in place, you can push the extension to your production tenant:
cds push --to http://localhost:4005 -u carol:You pushed the extension with mock user
carol, which in your local setup ensures they are sent to your production tenantt1.
Simplify your workflow with cds pull and cds push
Particularly when extending deployed SaaS apps, refer to cds login to save project settings and authentication data for later reuse.
Appendices
Configuring App Router
In a deployed multitenant SaaS application, you need to set up the App Router correctly. This setup lets the CDS command-line utilities connect to the MTX Sidecar without needing to authenticate again. If you haven't used both the cds add multitenancy and cds add approuter commands, it's likely that you'll need to tweak the App Router configuration. You can do this by adding a route to the MTX Sidecar.
{
  "routes": [
    {
      "source": "^/-/cds/.*",
      "destination": "mtx-api",
      "authenticationType": "none"
    }
  ]
}
This ensures that the App Router doesn't try to authenticate requests to MTX Sidecar, which would fail. Instead, the Sidecar authenticates requests itself.
About Extension Models
This section explains in detail about the possibilities that the CDS languages provides for extension models.
All names are subject to extension restrictions defined by the SaaS app.
Extending the Data Model
Following the extend directive it is pretty straightforward to extend the application with the following new artifacts:
- Extend existing entities with new (simple) fields.
- Create new entities.
- Extend existing entities with new associations.
- Add compositions to existing or new entities.
- Supply new or existing fields with default values, range checks, or value list (enum) checks.
- Define a mandatory check on new or existing fields.
- Define new unique constraints on new or existing entities.
using {sap.capire.bookshop, sap.capire.orders} from '@capire/fiori';
using {
  cuid, managed, Country, sap.common.CodeList
} from '@sap/cds/common';

namespace x_bookshop.extension;

// extend existing entity
extend orders.Orders with {
  x_Customer    : Association to one x_Customers;
  x_SalesRegion : Association to one x_SalesRegion;
  x_priority    : String @assert.range enum {high; medium; low} default 'medium';
  x_Remarks     : Composition of many x_Remarks on x_Remarks.parent = $self;
}
// new entity - as association target
entity x_Customers : cuid, managed {
  email        : String;
  firstName    : String;
  lastName     : String;
  creditCardNo : String;
  dateOfBirth  : Date;
  status       : String   @assert.range enum {platinum; gold; silver; bronze} default 'bronze';
  creditScore  : Decimal  @assert.range: [ 1.0, 100.0 ] default 50.0;
  PostalAddresses : Composition of many x_CustomerPostalAddresses on PostalAddresses.Customer = $self;
}

// new unique constraint (secondary index)
annotate x_Customers with @assert.unique: { email: [ email ] } {
  email @mandatory;  // mandatory check
}

// new entity - as composition target
entity x_CustomerPostalAddresses : cuid, managed {
  Customer     : Association to one x_Customers;
  description  : String;
  street       : String;
  town         : String;
  country      : Country;
}

// new entity - as code list
entity x_SalesRegion: CodeList {
  key regionCode : String(11);
}

// new entity - as composition target
entity x_Remarks : cuid, managed {
  parent      : Association to one orders.Orders;
  number      : Integer;
  remarksLine : String;
}
Tip
This example provides annotations for business logic handled automatically by CAP as documented in Providing Services.
Learn more about the basic syntax of the annotate directive
Extending the Service Model
In the existing in OrdersService, the new entities x_CustomerPostalAddresses and x_Remarks are automatically included since they are targets of the corresponding compositions.
The new entities x_Customers and x_SalesRegion are autoexposed in a read-only way as CodeLists. Only if wanted to change it, you would need to expose them explicitly:
using { OrdersService } from '@capire/fiori';

extend service OrdersService with {
  entity x_Customers   as projection on extension.x_Customers;
  entity x_SalesRegion as projection on extension.x_SalesRegion;
}
Extending UI Annotations
The following snippet demonstrates which UI annotations you need to expose your extensions to the SAP Fiori elements UI.
Add UI annotations for the completely new entities x_Customers, x_CustomerPostalAddresses, x_SalesRegion, x_Remarks:
using { OrdersService } from '@capire/fiori';

// new entity -- draft enabled
annotate OrdersService.x_Customers with @odata.draft.enabled;

// new entity -- titles
annotate OrdersService.x_Customers with {
  ID           @(
    UI.Hidden,
    Common : {Text : email}
  );
  firstName    @title : 'First Name';
  lastName     @title : 'Last Name';
  email        @title : 'Email';
  creditCardNo @title : 'Credit Card No';
  dateOfBirth  @title : 'Date of Birth';
  status       @title : 'Status';
  creditScore  @title : 'Credit Score';
}

// new entity -- titles
annotate OrdersService.x_CustomerPostalAddresses with {
  ID          @(
    UI.Hidden,
    Common : {Text : description}
  );
  description @title : 'Description';
  street      @title : 'Street';
  town        @title : 'Town';
  country     @title : 'Country';
}

// new entity -- titles
annotate x_SalesRegion : regionCode with @(
  title : 'Region Code',
  Common: { Text: name, TextArrangement: #TextOnly }
);


// new entity in service -- UI
annotate OrdersService.x_Customers with @(UI : {
  HeaderInfo       : {
    TypeName       : 'Customer',
    TypeNamePlural : 'Customers',
    Title          : { Value : email}
  },
  LineItem         : [
    {Value : firstName},
    {Value : lastName},
    {Value : email},
    {Value : status},
    {Value : creditScore}
  ],
  Facets           : [
  {$Type: 'UI.ReferenceFacet', Label: 'Main', Target : '@UI.FieldGroup#Main'},
  {$Type: 'UI.ReferenceFacet', Label: 'Customer Postal Addresses', Target: 'PostalAddresses/@UI.LineItem'}
],
  FieldGroup #Main : {Data : [
    {Value : firstName},
    {Value : lastName},
    {Value : email},
    {Value : status},
    {Value : creditScore}
  ]}
});

// new entity -- UI
annotate OrdersService.x_CustomerPostalAddresses with @(UI : {
  HeaderInfo       : {
    TypeName       : 'CustomerPostalAddress',
    TypeNamePlural : 'CustomerPostalAddresses',
    Title          : { Value : description }
  },
  LineItem         : [
    {Value : description},
    {Value : street},
    {Value : town},
    {Value : country_code}
  ],
  Facets           : [
    {$Type: 'UI.ReferenceFacet', Label: 'Main', Target : '@UI.FieldGroup#Main'}
  ],
  FieldGroup #Main : {Data : [
    {Value : description},
    {Value : street},
    {Value : town},
    {Value : country_code}
  ]}
}) {};

// new entity -- UI
annotate OrdersService.x_SalesRegion with @(
  UI: {
    HeaderInfo: {
      TypeName       : 'Sales Region',
      TypeNamePlural : 'Sales Regions',
      Title          : { Value : regionCode }
    },
    LineItem: [
      {Value: regionCode},
      {Value: name},
      {Value: descr}
    ],
    Facets: [
      {$Type: 'UI.ReferenceFacet', Label: 'Main', Target: '@UI.FieldGroup#Main'}
    ],
    FieldGroup#Main: {
      Data: [
        {Value: regionCode},
        {Value: name},
        {Value: descr}
      ]
    }
  }
) {};

// new entity -- UI
annotate OrdersService.x_Remarks with @(
  UI: {
    HeaderInfo: {
      TypeName       : 'Remark',
      TypeNamePlural : 'Remarks',
      Title          : { Value : number }
    },
    LineItem: [
      {Value: number},
      {Value: remarksLine}
    ],
    Facets: [
      {$Type: 'UI.ReferenceFacet', Label: 'Main', Target: '@UI.FieldGroup#Main'}
    ],
    FieldGroup#Main: {
      Data: [
          {Value: number},
          {Value: remarksLine}
      ]
    }
  }
) {};
Extending Array Values
Extend the existing UI annotation of the existing Orders entity with new extension fields and new facets using the special syntax for array-valued annotations.
// extend existing entity Orders with new extension fields and new composition
annotate OrdersService.Orders with @(
  UI: {
    LineItem: [
      ... up to { Value: OrderNo },                             // head
      {Value: x_Customer_ID,            Label:'Customer'},     //> extension field
      {Value: x_SalesRegion.regionCode, Label:'Sales Region'}, //> extension field
      {Value: x_priority,               Label:'Priority'},     //> extension field
      ...,                                                     // rest
    ],
    Facets: [...,
      {$Type: 'UI.ReferenceFacet', Label: 'Remarks', Target: 'x_Remarks/@UI.LineItem'} // new composition
    ],
    FieldGroup#Details: {
      Data: [...,
        {Value: x_Customer_ID,            Label:'Customer'},      // extension field
        {Value: x_SalesRegion.regionCode, Label:'Sales Region'},  // extension field
        {Value: x_priority,               Label:'Priority'}       // extension field
      ]
    }
  }
);
The advantage of this syntax is that you do not have to replicate the complete array content of the existing UI annotation, you only have to add the delta.
Semantic IDs
Finally, exchange the display ID (which is by default a GUID) of the new x_Customers entity with a human readable text which in your case is given by the unique property email.
// new field in existing service -- exchange ID with text
annotate OrdersService.Orders:x_Customer with @(
  Common: {
    //show email, not id for Customer in the context of Orders
    Text: x_Customer.email  , TextArrangement: #TextOnly,
    ValueList: {
      Label: 'Customers',
      CollectionPath: 'x_Customers',
      Parameters: [
        { $Type: 'Common.ValueListParameterInOut',
          LocalDataProperty: x_Customer_ID,
          ValueListProperty: 'ID'
        },
        { $Type: 'Common.ValueListParameterDisplayOnly',
          ValueListProperty: 'email'
        }
      ]
    }
  }
);
Localizable Texts
To externalize translatable texts, use the same approach as for standard applications, that is, create a i18n/i18n.properties file:
SalesRegion_name_col = Sales Region
Orders_priority_col = Priority
...
Then replace texts with the corresponding {i18n>...} keys from the properties file. Make sure to run cds build again.
Properties files must be placed in the i18n folder. If an entry with the same key exists in the SaaS application, the translation of the extension has preference.
This feature is available with
@sap/cds6.3.0 or higher.
Simplify Your Workflow With cds login
As a SaaS extension developer, you have the option to log in to the SaaS app and thus authenticate only once. This allows you to re-run cds pull and cds push against the app without repeating the same options over and over again – and you can avoid generating a passcode every time.
Achieve this by running cds login once. This command fetches tokens using OAuth2 from XSUAA and saves them for later use. For convenience, further settings for the current project are also stored, so you don't have to provide them again (such as the app URL and tenant subdomain).
Where Tokens Are Stored
Tokens are saved in the desktop keyring by default (libsecret on Linux, Keychain Access on macOS, or Credential Vault on Windows).
Using the keyring is more secure because, depending on the platform, you can lock and unlock it, and data saved by cds login may be inaccessible to other applications you run.
For details, refer to the documentation of the keyring implementation used on your development machine.
cds login therefore uses the keyring by default. To enable this, you need to install an additional Node.js module, keytar:
npm i -g keytarIf you decide against using the keyring, you can request cds login to write to a plain-text file by appending --plain.
Switching to and from plain-text
Once usage of the --plain option changes for a given SaaS app, cds login migrates pre-existing authentication data from the previous storage to the new storage.
Handle secrets with caution
Local storage of authentication data incurs a security risk: a potential malicious, local process might be able to perform actions you're authorized for, with the SaaS app, as your tenant.
In SAP Business Application Studio, plain-text storage is enforced when using
cds login, since no desktop keyring is available. The plain-text file resides in encrypted storage.
How to Login
If you work with Cloud Foundry (CF) and you have got the cf client installed, you can call cds login with just a passcode. The command runs the cf client to determine suitable apps from the org and space that you're logged in to. This allows you to interactively choose the login target from a list of apps and their respective URLs.
To log in to the SaaS app in this way, first change to the folder you want to use for your extension project. Then run the following command (the one-time passcode will be prompted interactively if omitted):
cds login [-p <passcode>]Advanced options
If you need to call cds login automatically without user interaction, you may use the Client Credentials grant, which does not require a passcode.
You can then omit the -p <passcode> option but will instead have to provide the Client ID and a specific form of client secret to authenticate.
Obtain these two from the VCAP_SERVICES environment variable in your deployed MTX server (@sap/cds-mtxs). In the JSON value, navigate to xsuaa[0].credentials.
If you find a
keyproperty (Private Key of the Client Certificate), XSUAA is configured to use X.509 (mTLS). Use this Private Key by specifyingcds login … -m <clientid>[:key].Otherwise, find the Client Secret in the
clientsecretproperty and usecds login … -c <clientid>[:<clientsecret>]in an analogous way.
Note: The key and clientsecret properties are secrets that should not be stored in an unsafe location in productive scenarios!
Learn more about environment variables / VCAP_Services.
If you leave out the respective secret (enclosed in square brackets above), you will be prompted to enter it interactively. This can be used to feed the secret from the environment to cds login via standard input, like so:
echo $MY_KEY | cds login … -m <clientid>For a synopsis of all options, run cds help login.
Login without CF CLI
If you don't work with CF CLI, additionally provide the application URL and the subdomain as these can't be determined automatically:
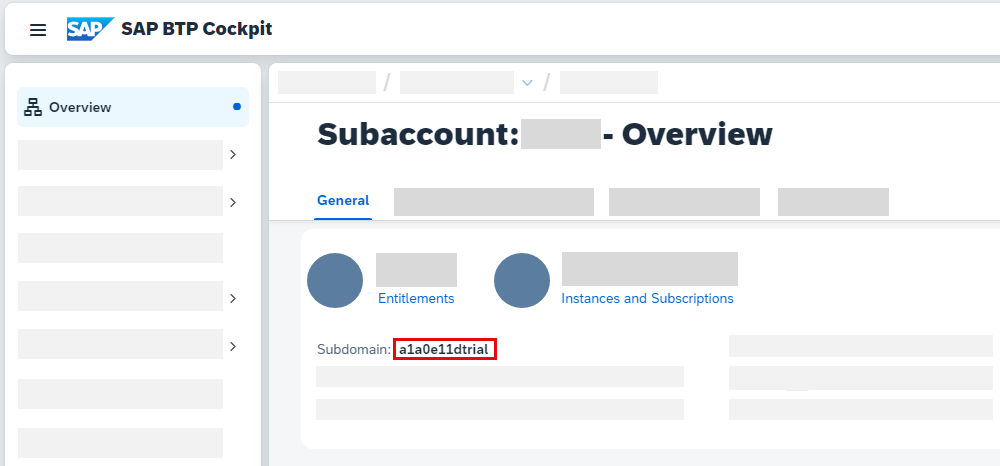
cds login [<auth-options>] -s <subdomain> <app-url>The <app-url> is the URL that you get in your subscriber account when you subscribe to an application. You find the <subdomain> in the overview page of your subaccount in the SAP BTP Cockpit:
Multiple targets
Should you later want to extend other SaaS applications, you can log in to them as well, and it won't affect your other logins. Logins are independent of each other, and cds pull etc. will be authenticated based on the requested target.
Simplified Workflow
Once you've logged in to the SaaS app, you can omit the passcode, the app URL, and the tenant subdomain, so in your development cycle you can run:
cds pull
# develop your extension
cds push
# develop your extension
cds push
# …
Override saved values with options
For example, run cds push -s <otherSubdomain> -p <otherPasscode> to activate your extension in another subdomain. This usage of cds push may be considered a kind of cross-client transport mechanism.
Refreshing Tokens
Tokens have a certain lifespan, after which they lose validity. To save you the hassle, cds login also stores the refresh token sent by XSUAA alongside the token (depending on configuration) and uses it to automatically renew the token after it has expired. By default, refresh tokens expire much later than the token itself, allowing you to work without re-entering passcodes for multiple successive days.
Cleaning Up
To remove locally saved authentication data and optionally, the project settings, run cds logout inside your extension project folder.
Append --delete-settings to include saved project settings for the current project folder as well.
cds help logout is available for more details.
Re-authenticate when your role-collection assignments have changed
Run cds logout followed by cds login in order to fetch a token with the new scopes.
Debugging
In case something unexpected happens, set the variable DEBUG=cli in your shell environment before re-running the corresponding command.
export DEBUG="cli"set DEBUG=cliSet-Variable -Name "DEBUG" -Value "cli"Add Data to Extensions
As described in Add Data, you can provide local test data and initial data for your extension. In this guide we copied local data from the test/data folder into the db/data folder. When using SQLite, this step can be further simplified. For sap.capire.orders-Orders.csv, just add the new columns along with the primary key: `
ID,x_priority,x_salesRegion_code
7e2f2640-6866-4dcf-8f4d-3027aa831cad,high,EMEA
64e718c9-ff99-47f1-8ca3-950c850777d4,low,APJ
Adding data only for missing columns doesn't work with SAP HANA
With SAP HANA, you always have to provide the full set of data.