Serving Fiori UIs
CAP provides out-of-the-box support for SAP Fiori elements front ends.
This guide explains how to add one or more SAP Fiori elements apps to a CAP project, how to add SAP Fiori elements annotations to respective service definitions, and more. In the following sections, when mentioning Fiori, we always mean SAP Fiori elements.
Learn more about developing SAP Fiori elements and OData V4 (since 1.84.)
SAP Fiori Preview
For entities exposed via OData V4 there is a Fiori preview link on the index page. It dynamically serves an SAP Fiori Elements list page that allows you to quickly see the effect of annotation changes without having to create a UI application first.
Be aware that this is not meant for production.
The preview not meant as a replacement for a proper SAP Fiori Elements (UI5) application. It is only active locally where the development profile is enabled.
To also enable it in cloud deployments, for test or demo purposes maybe, set cds.fiori.preview:true.
The preview not meant as a replacement for a proper SAP Fiori Elements (UI5) application. It is active by default, but disabled automatically in case the production profile is enabled.
To also enable it in cloud deployments, for test or demo purposes maybe, set cds.index-page.enabled:true.
Adding Fiori Apps
As showcased in cap/samples, SAP Fiori apps should be added as sub folders to the app/ of a CAP project. Each sub folder constitutes an individual SAP Fiori application, with local annotations, manifest.json, etc. So, a typical folder layout would look like this:
| Folder/Sub Folder | Description |
|---|---|
app/ | All SAP Fiori apps should go in here |
browse/ | SAP Fiori app for end users |
orders/ | SAP Fiori app for order management |
admin/ | SAP Fiori app for admins |
index.html | For sandbox tests |
srv/ | All services |
db/ | Domain models, and db stuff |
TIP
Links to Fiori applications created in the app/ folder are automatically added to the index page of your CAP application for local development.
Using SAP Fiori Tools
The SAP Fiori tools provide advanced support for adding SAP Fiori apps to existing CAP projects as well as a wealth of productivity tools, for example for adding SAP Fiori annotations, or graphical modeling and editing. They can be used locally in Visual Studio Code (VS Code) or in SAP Business Application Studio.
Using cds add
Use cds add sample to add Fiori sample code to an existing project, or create a new one with cds init <project> --add sample.
From cap/samples
For example, you can copy the SAP Fiori apps from cap/samples as a template and modify the content as appropriate.
From Incidents Sample
This is a sample to create an incident management app with SAP Fiori elements for OData V4.
Fiori Annotations
The main content to add is service definitions annotated with information about how to render respective data.
What Are SAP Fiori Annotations?
SAP Fiori elements apps are generic front ends, which construct and render the pages and controls based on annotated metadata documents. The annotations provide semantic annotations used to render such content, for example:
annotate CatalogService.Books with @(
  UI: {
    SelectionFields: [ ID, price, currency_code ],
    LineItem: [
      {Value: title},
      {Value: author, Label:'{i18n>Author}'},
      {Value: genre.name},
      {Value: price},
      {Value: currency.symbol, Label:' '},
    ]
  }
);
Find this source and many more in cap/samples.Learn more about OData Annotations in CDS.
Where to Put Them?
While CDS in principle allows you to add such annotations everywhere in your models, we recommend putting them in separate .cds files placed in your ./app/* folders, for example, as follows.
./app  #> all your Fiori annotations should go here, for example:
   ./admin
      fiori-service.cds #> annotating ../srv/admin-service.cds
   ./browse
      fiori-service.cds #> annotating ../srv/cat-service.cds
   services.cds #> imports ./admin/fiori-service and ./browse/fiori-service
./srv  #> all service definitions should stay clean in here:
   admin-service.cds
   cat-service.cds
...
See this also in cap/samples/fiori.
Reasoning: This recommendation essentially follows the best practices and guiding principles of Conceptual Modeling and Separation of Concerns.
Maintaining Annotations
Maintaining OData annotations in .cds files is accelerated by the SAP Fiori tools - CDS OData Language Server @sap/ux-cds-odata-language-server-extension in the SAP CDS language support plugin. It helps you add and edit OData annotations in CDS syntax with:
- Code completion
- Validation against the OData vocabularies and project metadata
- Navigation to the referenced annotations
- Quick view of vocabulary information
- Internationalization support
These assisting features are provided for OData annotations in CDS syntax and can't be used yet for the core data services common annotations.
The @sap/ux-cds-odata-language-server-extension module doesn't require any manual installation. The latest version is fetched by default from npmjs.com as indicated in the user preference setting CDS > Contributions: Registry.
Learn more about the CDS extension for VS Code.
Code Completion
The CDS OData Language Server provides a list of context-sensitive suggestions based on the service metadata and OData vocabularies. You can use it to choose OData annotation terms, their properties, and values from the list of suggestions in annotate directives applied to service entities and entity elements. See annotate directives for more details.
Using Code Completion
To trigger code completion, choose CtrlSpace. The list of suggested values is displayed.
Note: You can filter the list of suggested values by typing more characters.
Navigate to the desired value using the up or down arrows or your mouse. Accept the highlighted value by pressing Enter or by clicking the mouse. Use code completion to add and change individual values (word-based completion) and to add small code blocks containing annotation structures along with mandatory properties (micro-snippets). In an active code snippet, you can use the ⇥ (tab) key to quickly move to the next tab stop.
Example: Annotating Service Entities
(cursor position indicated by |)
Place cursor in the
annotatedirective for a service entity, for exampleannotate Foo.Bar with ;and trigger code completion.Type
uto filter the suggestions and choose{} UI. Micro-snippet@UI : {|}is inserted:annotate Foo.Bar with @UI : {|};Use code completion again to add an annotation term from the UI vocabulary, in this example
SelectionFields. The micro snippet for this annotation is added and the cursor is placed directly after the term name letting you define a qualifier:annotate Foo.Bar with @UI : {SelectionFields | : []};Press the ⇥ (tab) key to move the cursor to the next tab stop and use code completion again to add values. Because the
UI.SelectionFieldsannotation is a collection of entity elements (entity properties), all elements of the annotated entity are suggested.TIP
To choose an element of an associated entity, first select the corresponding association from the list and type . (period). Elements of associated entity are suggested.
Note: You can add multiple values separated by comma.
annotate Foo.Bar with @UI : { SelectionFields : [
    description, assignedIndividual.lastName|
  ],
};
Add a new line after
,(comma) and use code completion again to add another annotation from the UI vocabulary, such asLineItem. Line item is a collection ofDataFieldrecords. To add a record, select the record type you need from the completion list.cdsannotate Foo.Bar with @UI : { SelectionFields : [ description, assignedIndividual.lastName ], LineItem : [{ $Type:'UI.DataField', Value : |, }, };Note: For each record type, two kinds of micro-snippets are provided: one containing only mandatory properties and one containing all properties defined for this record (full record). Usually you need just a subset of properties. So, you either select a full record and then remove the properties you don't need, or add the record containing only required properties and then add the remaining properties.
Use code completion to add values for the annotation properties.
cdsannotate Foo.Bar with @UI : { SelectionFields : [ description, assignedIndividual.lastName ], LineItem : [ { $Type:'UI.DataField', Value : description, }, { $Type:'UI.DataFieldForAnnotation', Target : 'assignedIndividual/@Communication.Contact', },| ] };Note: To add values pointing to annotations defined in another CDS source, you must reference this source with the
usingdirective. See TheusingDirective for more details.
Example: Annotating Entity Elements
(cursor position indicated by |)
- Place the cursor in the
annotatedirective, for exampleannotate Foo.Bar with {|};, add a new line and trigger code completion. You get the list of entity elements. Choose the one that you want to annotate.
annotate Foo.Bar with {
    code|
};- Press the ⎵ key, use code completion again, and choose
{} UI. The@UI : {|}micro-snippet is inserted:
annotate Foo.Bar with {
    code @UI : { | }
};- Trigger completion again and choose an annotation term from the UI vocabulary, in this example: Hidden.
annotate Foo.Bar with {
    code @UI : {Hidden : |}
};- Press the ⇥ (tab) key to move the cursor to the next tab stop and use code completion again to add the value. Because the
UI.Hiddenannotation is of Boolean type, the values true and false are suggested:
annotate Foo.Bar with {
    code @UI : {Hidden : false }
};
Diagnostics
The CDS OData Language Server validates OData annotations in .cds files against the service metadata and OData vocabularies. It also checks provided string content for language-dependent annotation values and warns you if the format doesn't match the internationalization (i18n) key reference. It shows you that this string is hard coded and won't change based on the language setting in your application. See Internationalization support for more details.
Validation is performed when you open a .cds file and then is retriggered with each change to the relevant files.
You can view the diagnostic messages by hovering over the highlighted part in the annotation file or by opening the problems panel. Click on the message in the problems panel to navigate to the related place in the annotation file.
Note: If an annotation value points to the annotation defined in another CDS source, you must reference this source with a
usingdirective to avoid warnings. See TheusingDirective for more details.
Navigation to Referenced Annotations
CDS OData Language Server enables quick navigation to the definition of referenced annotations. For example, if your annotation file contains a DataFieldForAnnotation record referencing an Identification annotation defined in the service file, you can view which file it's defined in and what fields or labels this annotation contains. You can even update the Identification annotation or add comments.
You can navigate to the referenced annotation using the Peek Definition and Go To Definition features.
Note: If the referenced annotation is defined in another CDS source, you must reference this source with the
usingdirective to enable the navigation. See TheusingDirective for more details.
Peek Definition
Peek Definition lets you preview and update the referenced annotation without switching away from the code that you're writing. It's triggered when your cursor is inside the referenced annotation value.
- Using a keyboard: choose ⌥F12 (macOS) or AltF12 (other platforms)
- Using a mouse: right-click and select Peek Definition If an annotation is defined in multiple sources, all these sources are listed. You can select which one you want to view or update. Annotation layering isn't considered.
Go to Definition
Go To Definition lets you navigate to the source of the referenced annotation and opens the source file scrolled to the respective place in a new tab. It's triggered when your cursor is inside the referenced annotation value.
Place your cursor inside the path referencing the annotation term segment or translatable string value, and trigger Go to Definition:
- Using a keyboard: choose F12 in VS Code, or CtrlF12 in SAP Business Application Studio
- Using a mouse: right-click and select Go To Definition
- Using a keyboard and mouse: ⌘ + mouse click (macOS) or Ctrl + mouse click (other platforms)
If an annotation is defined in multiple sources, a Peek definition listing these sources will be shown instead. Annotation layering isn't considered.
Documentation (Quick Info)
The annotation language server provides quick information for annotation terms, record types, and properties used in the annotation file, or provided as suggestions in code completion lists. This information is retrieved from the respective OData vocabularies and can provide answers to the following questions:
- What is the type and purpose of the annotation term/record type/property?
- What targets can the annotation term apply to?
- Is the annotation term/record type/property experimental? Is it deprecated?
- Is this annotation property mandatory or optional?
Note: The exact content depends on the availability in OData vocabularies.
To view the quick info for an annotation term, record type, or property used in the annotation file, hover your mouse over it. The accompanying documentation is displayed in a hover window, if provided in the respective OData vocabularies.
To view the quick info for each suggestion in the code completion list, either pressing CtrlSpace, or click the info icon. The accompanying documentation for the suggestion expands to the side. The expanded documentation stays open and updates as you navigate the list.
Internationalization Support
When you open an annotation file, all language-dependent string values are checked against the i18n.properties file. Each value that doesn't represent a valid reference to the existing text key in the i18n.properties file, is indicated with a warning. A Quick Fix action is suggested to generate a text key in i18n file and substitute your string value with the reference to that entry.
Prefer @title and @description
Influenced by the JSON Schema, CDS supports the common annotations @title and @description, which are mapped to corresponding OData annotations as follows:
| CDS | JSON Schema | OData |
|---|---|---|
@title | title | @Common.Label |
@description | description | @Core.Description |
We recommend preferring these annotations over the OData ones in protocol-agnostic data models and service models, for example:
annotate my.Books with { //...
   title @title: 'Book Title';
   author @title: 'Author ID';
}
Prefer @readonly, @mandatory, ...
CDS supports @readonly as a common annotation, which translates to respective OData annotations from the @Capabilities vocabulary. We recommend using the former for reasons of conciseness and comprehensibility as shown in this example:
@readonly entity Foo {   // entity-level
  @readonly foo : String // element-level
}
is equivalent to:
entity Foo @(Capabilities:{
  // entity-level
  InsertRestrictions.Insertable: false,
  UpdateRestrictions.Updatable: false,
  DeleteRestrictions.Deletable: false
}) {
  // element-level
  @Core.Computed foo : String
}
Similar recommendations apply to @mandatory and others → see Common Annotations.
Draft Support
SAP Fiori supports edit sessions with draft states stored on the server, so users can interrupt and continue later on, possibly from different places and devices. CAP, as well as SAP Fiori elements, provide out-of-the-box support for drafts as outlined in the following sections. We recommend to always use draft when your application needs data input by end users.
For details and guidelines, see SAP Fiori Design Guidelines for Draft.
Find a working end-to-end version in cap/samples/fiori.
For details about the draft flow in SAP Fiori elements, see SAP Fiori elements > Draft Handling
Enabling Draft with @odata.draft.enabled
To enable draft for an entity exposed by a service, simply annotate it with @odata.draft.enabled as in this example:
annotate AdminService.Books with @odata.draft.enabled;WARNING
You can't project from draft-enabled entities, as annotations are propagated. Either enable the draft for the projection and not the original entity or disable the draft on the projection using @odata.draft.enabled: null.
Difference between Compositions and Associations
Be aware that you cannot modify associated entities through drafts. Only compositions will get a "Create" button in SAP Fiori elements UIs because they are stored as part of the same draft entity.
Enabling Draft for Localized Data
Annotate the underlying base entity in the base model with @fiori.draft.enabled to also support drafts for localized data:
annotate sap.capire.bookshop.Books with @fiori.draft.enabled;Background
SAP Fiori drafts required single keys of type UUID, which isn't the case by default for the automatically generated _texts entities (→ see the Localized Data guide for details). The @fiori.draft.enabled annotation tells the compiler to add such a technical primary key element named ID_texts.
WARNING
Adding the annotation @fiori.draft.enabled won't work if the corresponding _texts entities contain any entries, because existing entries don't have a value for the new key field ID_texts.
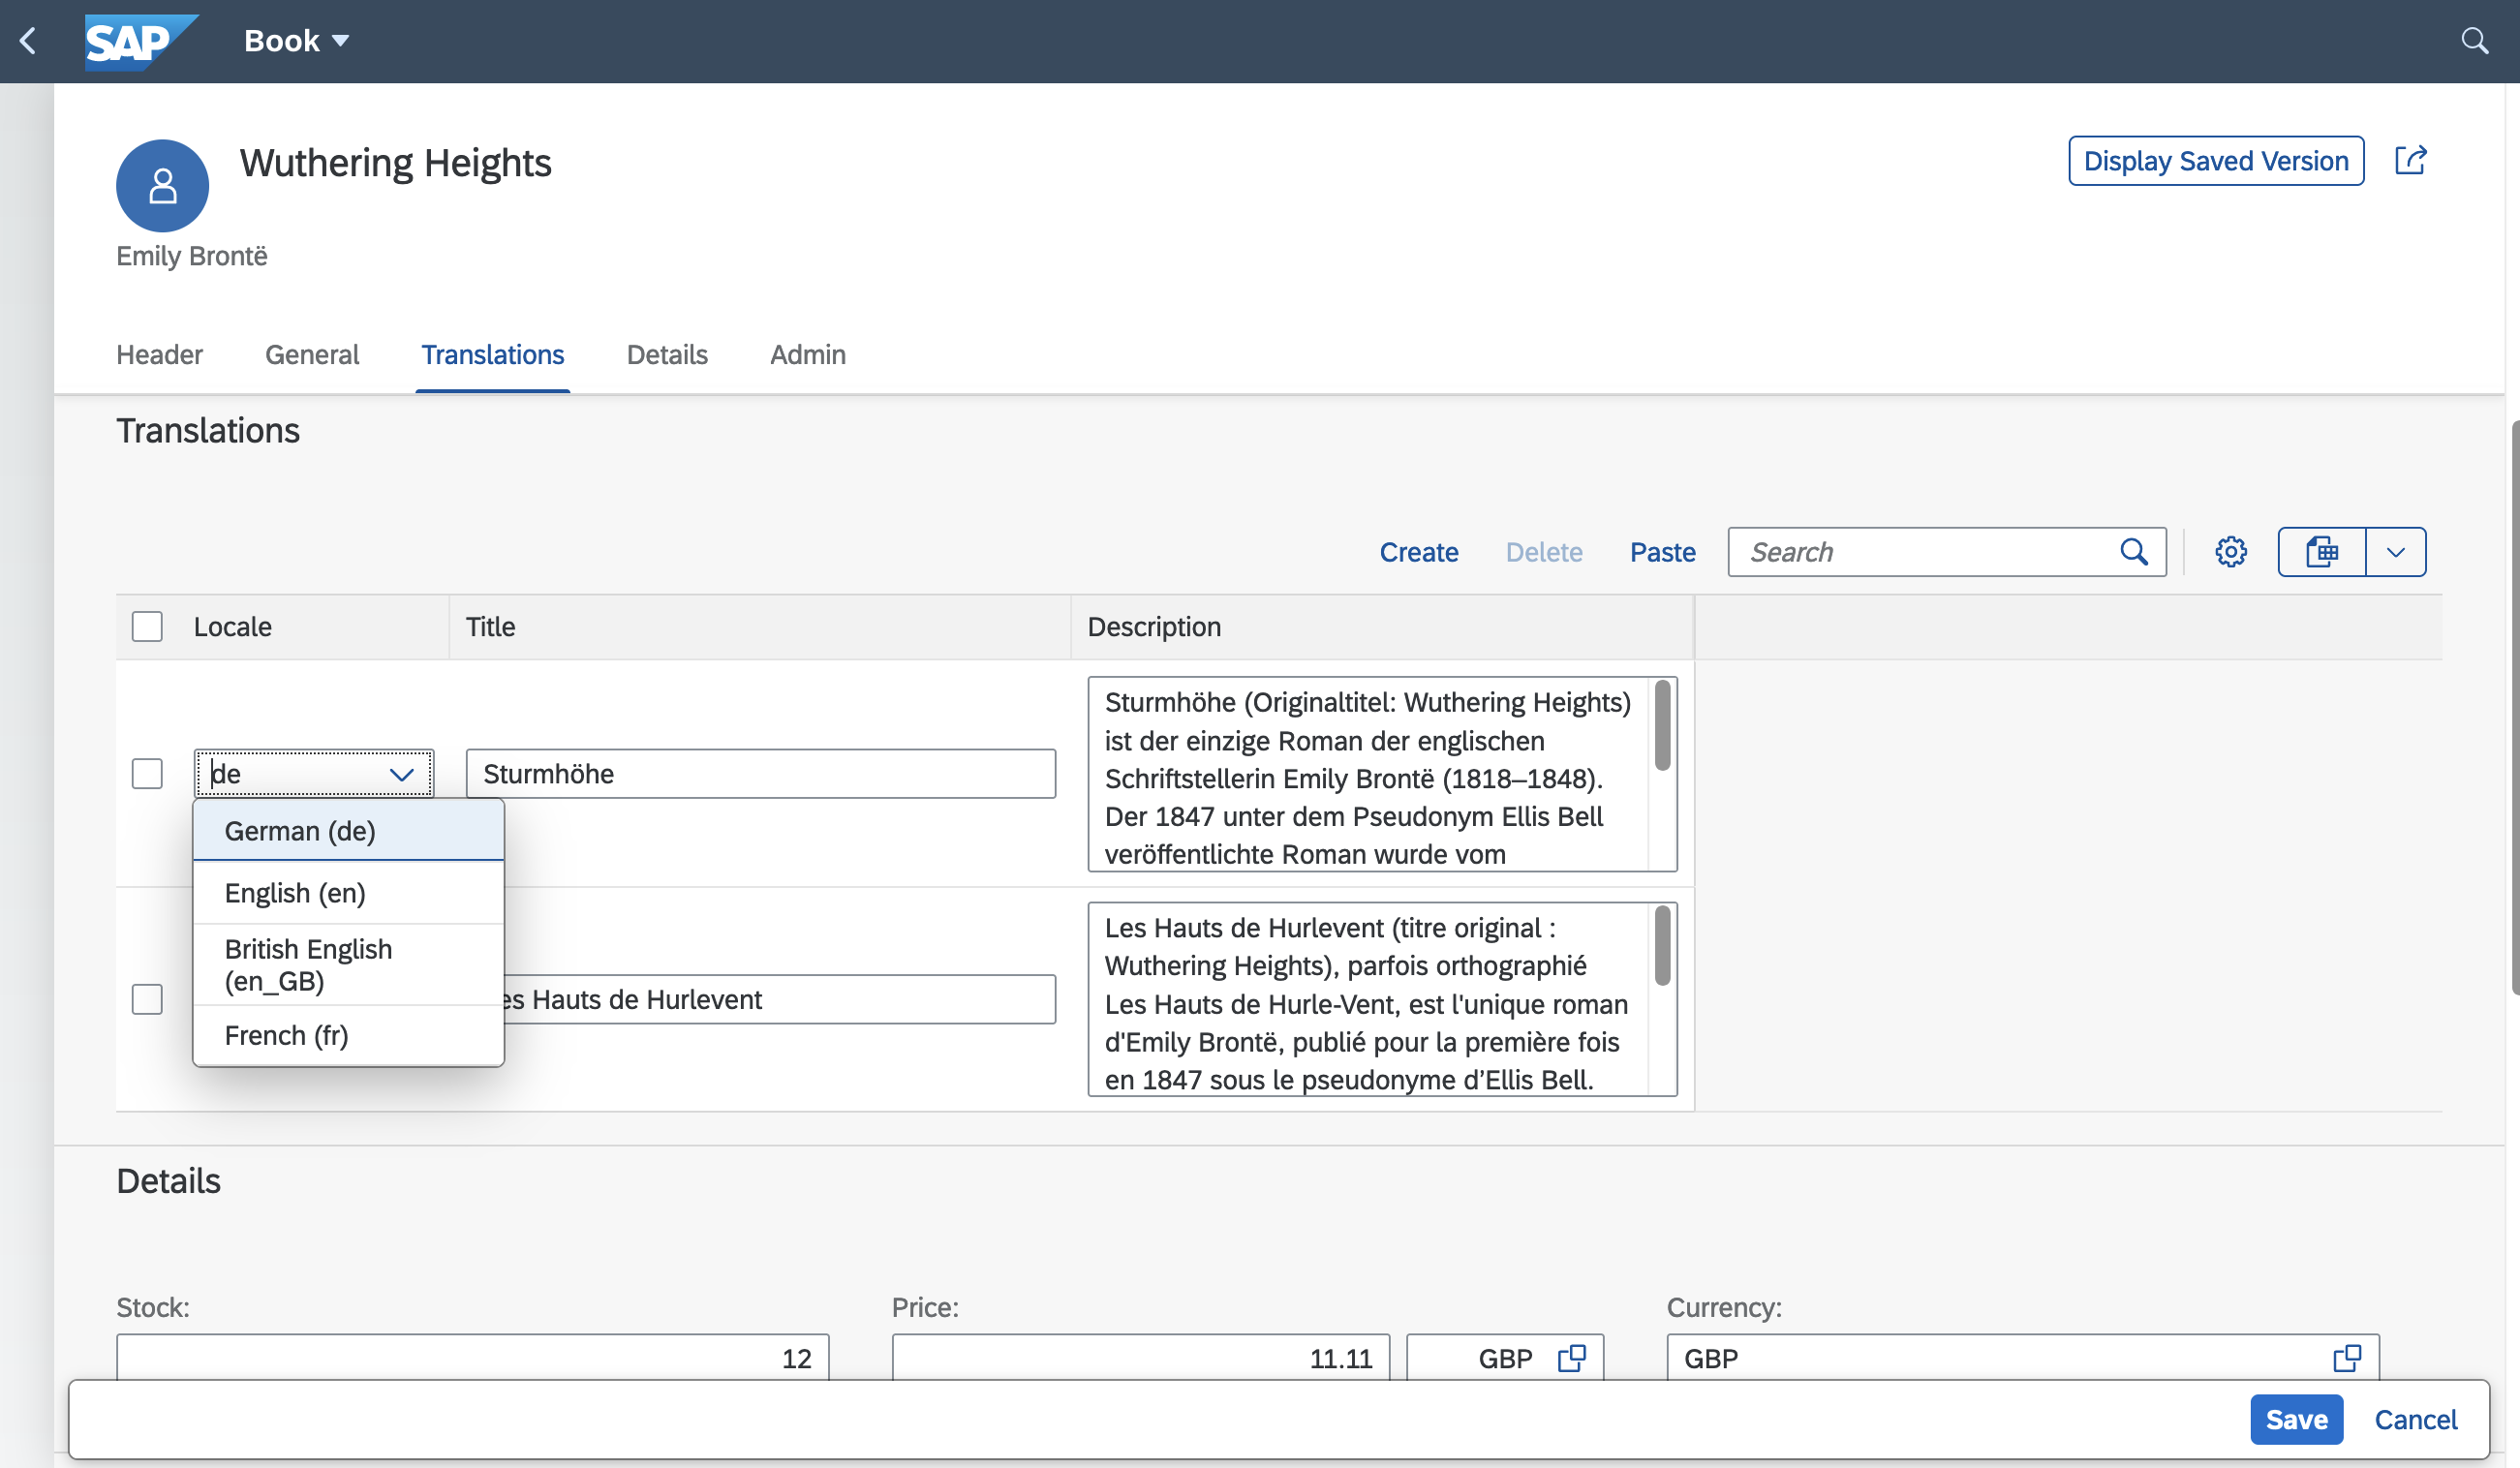
If you're editing data in multiple languages, the General tab in the example above is reserved for the default language (often "en"). Any change to other languages has to be done in the Translations tab, where a corresponding language can be chosen from a drop-down menu as illustrated above. This also applies if you use the URL parameter sap-language on the draft page.
Validating Drafts
You can add custom handlers to add specific validations, as usual. In addition, for a draft, you can register handlers to the respective UPDATE events to validate input per field, during the edit session, as follows.
... in Java
You can add your validation logic before operation event handlers. Specific events for draft operations exist. See Java > Fiori Drafts > Editing Drafts for more details.
... in Node.js
You can add your validation logic before the operation handler for either CRUD or draft-specific events. See Node.js > Fiori Support > Handlers Registration for more details about handler registration.
Query Drafts Programmatically
To access drafts in code, you can use the .drafts reflection.
SELECT.from(Books.drafts) //returns all drafts of the Books entityLearn how to query drafts in Java.
Use Roles to Toggle Visibility of UI elements
In addition to adding restrictions on services, entities, and actions/functions, there are use cases where you only want to hide certain parts of the UI for specific users. This is possible by using the respective UI annotations like @UI.Hidden or @UI.CreateHidden in conjunction with $edmJson pointing to a singleton.
First, you define the singleton in your service and annotate it with @cds.persistence.skip so that no database artefact is created:
@odata.singleton @cds.persistence.skip
entity Configuration {
    key ID: String;
    isAdmin : Boolean;
}
A key is technically not required, but without it some consumers might run into problems.
Then define an on handler for serving the request:
srv.on('READ', 'Configuration', async req => {
    req.reply({
        isAdmin: req.user.is('admin') //admin is the role, which for example is also used in @requires annotation
    });
});
Finally, refer to the singleton in the annotation by using a dynamic expression:
annotate service.Books with @(
    UI.CreateHidden : { $edmJson: {$Not: { $Path: '/CatalogService.EntityContainer/Configuration/isAdmin'} } },
    UI.UpdateHidden : { $edmJson: {$Not: { $Path: '/CatalogService.EntityContainer/Configuration/isAdmin'} } },
);
The Entity Container is OData specific and refers to the $metadata of the OData service in which all accessible entities are located within the Entity Container.
SAP Fiori elements also allows to not include it in the path
annotate service.Books with @(
    UI.CreateHidden : { $edmJson: {$Not: { $Path: '/Configuration/isAdmin'} } },
    UI.UpdateHidden : { $edmJson: {$Not: { $Path: '/Configuration/isAdmin'} } },
);
Value Helps
In addition to supporting the standard @Common.ValueList annotations as defined in the OData Vocabularies, CAP provides advanced, convenient support for Value Help as understood and supported by SAP Fiori.
Convenience Option @cds.odata.valuelist
Simply add the @cds.odata.valuelist annotation to an entity, and all managed associations targeting this entity will automatically receive Value Lists in SAP Fiori clients. For example:
@cds.odata.valuelist
entity Currencies {}service BookshopService {
entity Books { //...
currency : Association to Currencies;
}
}Pre-Defined Types in @sap/cds/common
The reuse types in @sap/cds/common already have this added to base types and entities, so all uses automatically benefit from this. This is an effective excerpt of respective definitions in @sap/cds/common:
type Currencies : Association to sap.common.Currencies;context sap.common {
entity Currencies : CodeList {...};
entity CodeList { name : localized String; ... }
}annotate sap.common.CodeList with @(
UI.Identification: [name],
cds.odata.valuelist,
);Usages of @sap/cds/common
In effect, usages of @sap/cds/common stay clean of any pollution, for example:
using { Currency } from '@sap/cds/common';
entity Books { //...
  currency : Currency;
}
Find this also in our cap/samples.
Still, all SAP Fiori UIs, on all services exposing Books, will automatically receive Value Help for currencies. You can also benefit from that when deriving your project-specific code list entities from sap.common.CodeList.
Resulting Annotations in EDMX
Here is an example showing how this ends up as OData Common.ValueList annotations:
<Annotations Target="AdminService.Books/currency_code">
  <Annotation Term="Common.ValueList">
    <Record Type="Common.ValueListType">
      <PropertyValue Property="CollectionPath" String="Currencies"/>
      <PropertyValue Property="Label" String="Currency"/>
      <PropertyValue Property="Parameters">
        <Collection>
          <Record Type="Common.ValueListParameterInOut">
            <PropertyValue Property="ValueListProperty" String="code"/>
            <PropertyValue Property="LocalDataProperty" PropertyPath="currency_code"/>
          </Record>
          <Record Type="Common.ValueListParameterDisplayOnly">
            <PropertyValue Property="ValueListProperty" String="name"/>
          </Record>
        </Collection>
      </PropertyValue>
    </Record>
  </Annotation>
</Annotation>
Actions
In our SFLIGHT sample application, we showcase how to use actions covering the definition in your CDS model, the needed custom code and the UI implementation.
Learn more about Custom Actions & Functions.
We're going to look at three things.
- Define the action in CDS and custom code.
- Create buttons to bring the action to the UI
- Dynamically define the buttons status on the UI
First you need to define an action, like in the travel-service.cds file.
entity Travel as projection on my.Travel actions {
    action createTravelByTemplate() returns Travel;
    action rejectTravel();
    action acceptTravel();
    action deductDiscount( percent: Percentage not null ) returns Travel;
  };
To define what the action actually is doing, you need to write some custom code. See the travel-service.ts file for example:
this.on('acceptTravel', req => UPDATE(req.subject).with({TravelStatus_code:'A'}))Create the buttons, to bring this action onto the UI and make it actionable for the user. There are two buttons: On the overview and in the detail screen. Both are defined in the layouts.cds file.
For the overview of all travels, use the @UI.LineItem annotation.
annotate TravelService.Travel with @UI : {
LineItem : [
    { $Type  : 'UI.DataFieldForAction',
      Action : 'TravelService.acceptTravel',
      Label  : '{i18n>AcceptTravel}'   }
  ]
};
For the detail screen of a travel, use the @UI.Identification annotation.
annotate TravelService.Travel with @UI : {
  Identification : [
    { $Type  : 'UI.DataFieldForAction',
      Action : 'TravelService.acceptTravel',
      Label  : '{i18n>AcceptTravel}'   }
  ]
};
Now, the buttons are there and connected to the action. The missing piece is to define the availability of the buttons dynamically. Annotate the Travel entity in the TravelService service accordingly in the field-control.cds file.
annotate TravelService.Travel with actions {
 acceptTravel @(
   Core.OperationAvailable : {
     $edmJson: { $Ne: [{ $Path: 'in/TravelStatus_code'}, 'A']}
   },
   Common.SideEffects.TargetProperties : ['in/TravelStatus_code'], ) };
This annotation uses dynamic expressions to control the buttons for each action. And the status of a travel on the UI is updated, triggered by the @Common.SideEffects.TargetProperties annotation.
More complex calculation
If you have the need for a more complex calculation, then the interesting parts in (an older version of) SFLIGHT are virtual fields in field-control.cds (also lines 37-44) and custom code in travel-service.js.
Cache Control
CAP provides the option to set a Cache-Control header with a max-age directive to indicate that a response remains fresh until n seconds after it was generated . In the CDS model, this can be done using the @http.CacheControl: {maxAge: <seconds>} annotation on stream properties. The header indicates that caches can store the response and reuse it for subsequent requests while it's fresh. The max-age (in seconds) specifies the maximum age of the content before it becomes stale.
Elapsed time since the response was generated
The max-age is the elapsed time since the response was generated on the origin server. It's not related to when the response was received.
Only Java
Cache Control feature is currently supported on the Java runtime only.