
Authentication
This guide is about authenticating users on incoming HTTP requests.
This is done by authentication middlewares setting the cds.context.user property which is then used in authorization enforcement decisions.
cds. User
Represents the currently logged-in user as filled into cds.context.user by authentication middlewares. Simply create instances of cds.User or of subclasses thereof in custom middlewares. For example:
const cds = require('@sap/cds')
const DummyUser = new class extends cds.User { is:()=>true }
module.exports = (req,res,next) => {
  cds.context.user = new DummyUser('dummy')
  next()
}
Or you can call the constructor of cds.User with specific arguments, to create a user instance. For example:
const cds = require('@sap/cds')
// with user ID as string
const user = new cds.User('userId')
// a user instance
const anotherUser = new cds.User(user)
// a user instance like object
const yetAnotherUser = new cds.User({id: user.id, roles: user.roles, attr: user.attr})
.is (<role>)
Checks if user has assigned the given role. Example usage:
if (req.user.is('admin')) ...The role names correspond to the values of @requires and the @restrict.grants.to annotations in your CDS models.
. id
A user's unique ID. It corresponds to $user in @restrict annotations of your CDS models (Also in JavaScript, user can act as a shortcut for user.id in comparisons.)
. attr
User-related attributes, for example, from JWT tokens These correspond to $user.<x> in @restrict annotations of your CDS models
. authInfo?
Optional generic container for authentication-related information. For @sap/xssec-based authentication strategies (ias, jwt, and xsuaa), cds.context.user.authInfo is an instance of @sap/xssec's SecurityContext.
Note: The availability of this API depends on the implementation of the respective authentication middleware.
Warning
The cds.User.authInfo property depends on the authentication library that you use. CAP does not guarantee the content of this property. Use it with caution. Always pin your dependencies as described in the best practices.
cds.User.Privileged
In some cases, you might need to bypass authorization checks while consuming a local service. For this, you can create a transaction with a privileged user as follows:
this.before('*', function (req) {
  const user = new cds.User.Privileged
  return this.tx({ user }, tx => tx.run(
    INSERT.into('RequestLog').entries({
      url: req._.req.url,
      user: req.user.id
    })
  )
})
Alternatively, you can also use the ready-to-use instance cds.User.privileged directly, that is, const user = cds.User.privileged.
cds.User.Anonymous
Class cds.User.Anonymous allows you to instantiate an anonymous user (const user = new cds.User.Anonymous), for example in a custom authentication implementation.
Alternatively, you can also use the ready-to-use instance cds.User.anonymous directly, that is, const user = cds.User.anonymous.
cds.User.default
If a request couldn't be authenticated, for example due to a missing authorization header, the framework will use cds.User.default as fallback.
By default, cds.User.default points to cds.User.Anonymous. However, you can override this, for example to be cds.User.Privileged in tests, or to be any other class that returns an instance of cds.User.
Authorization Enforcement
Applications can use the cds.context.user APIs to do programmatic enforcement. For example, the authorization of the following CDS service:
service CustomerService @(requires: 'authenticated-user'){
  entity Orders @(restrict: [
    { grant: ['READ','WRITE'], to: 'admin' },
  ]){/*...*/}
  entity Approval @(restrict: [
    { grant: 'WRITE', where: '$user.level > 2' }
  ]){/*...*/}
}
can be programmatically enforced by means of the API as follows:
const cds = require('@sap/cds')
cds.serve ('CustomerService') .with (function(){
  this.before ('*', req =>
    req.user.is('authenticated') || req.reject(403)
  )
  this.before (['READ', 'CREATE'], 'Orders', req =>
    req.user.is('admin') || req.reject(403)
  )
  this.before ('*', 'Approval', req =>
    req.user.attr.level > 2 || req.reject(403)
  )
})
Authentication Strategies
CAP ships with a few prebuilt authentication strategies, used by default: mocked during development and jwt in production. You can override these defaults and configure the authentication strategy to be used through the cds.requires.auth config option in cds.env, for example:
"cds": {
  "requires": {
    "auth": "jwt"
  }
}
Inspect effective configuration
Run cds env get requires.auth in your project root to find out the effective config for your current environment.
Dummy Authentication
This strategy creates a user that passes all authorization checks. It's meant for temporarily disabling the @requires and @restrict annotations at development time.
Configuration: Choose this strategy as follows:
"cds": {
  "requires": {
    "auth": "dummy"
  }
}
Mocked Authentication
This authentication strategy uses basic authentication with pre-defined mock users during development.
Mocked authentication is not suitable for production!
Note: When testing different users in the browser, it's best to use an incognito window, because logon information might otherwise be reused.
Configuration: Choose this strategy as follows:
"cds": {
  "requires": {
    "auth": "mocked"
  }
}
You can optionally configure users as follows:
"cds": {
  "requires": {
    "auth": {
      "kind": "mocked",
      "users": {
        "<user.id>": {
          "password": "<password>",
          "roles": [ "<role-name>", ... ],
          "attr": { ... }
        }
      }
    }
  }
}
Pre-defined Mock Users
The default configuration shipped with @sap/cds specifies these users:
  "users": {
    "alice": { "tenant": "t1", "roles": [ "admin" ] },
    "bob":   { "tenant": "t1", "roles": [ "cds.ExtensionDeveloper" ] },
    "carol": { "tenant": "t1", "roles": [ "admin", "cds.ExtensionDeveloper", "cds.UIFlexDeveloper" ] },
    "dave":  { "tenant": "t1", "roles": [ "admin" ], "features": [] },
    "erin":  { "tenant": "t2", "roles": [ "admin", "cds.ExtensionDeveloper", "cds.UIFlexDeveloper" ] },
    "fred":  { "tenant": "t2", "features": [ "isbn" ] },
    "me":    { "tenant": "t1", "features": [ "*" ] },
    "yves":  { "roles": [ "internal-user" ] }
    "*":     true //> all other logins are allowed as well
  }
This default configuration is merged with your custom configuration such that, by default, logins by alice, bob, ... and others (*) are allowed.
If you want to restrict these additional logins, you need to overwrite the defaults:
  "users": {
    "alice": { "roles": [] },
    "bob": { "roles": [] },
    "*": false //> do not allow other users than the ones specified
  }
Tip
The pre-defined mock users can be deactivated by using kind basic instead of mocked. In that case configure users yourself, as described previously.
JWT-based Authentication
This is the default strategy used in production. User identity, as well as assigned roles and user attributes, are provided at runtime, by a bound instance of the 'User Account and Authentication' service (UAA). This is done in form of a JWT token in the Authorization header of incoming HTTP requests.
This authentication strategy also adds cds.context.user.authInfo.
Prerequisites: You need to add @sap/xssec to your project:
npm add @sap/xssecConfiguration: Choose this strategy as follows:
"cds": {
  "requires": {
    "auth": "jwt"
  }
}
Learn more about testing JWT-based authentication in XSUAA in Hybrid Setup.
XSUAA-based Authentication
Authentication kind xsuaa is a logical extension of kind jwt that additionally offers access to SAML attributes through cds.context.user.attr (for example, cds.context.user.attr.familyName).
Prerequisites: You need to add @sap/xssec to your project:
npm add @sap/xssecConfiguration: Choose this strategy as follows:
"cds": {
  "requires": {
    "auth": "xsuaa"
  }
}
See XSUAA in Hybrid Setup below for additional information of how to test this
IAS-based Authentication
This is an additional authentication strategy using the Identity Authentication Service (IAS) that can be used in production. User identity and user attributes are provided at runtime, by a bound instance of the IAS service. This is done in form of a JWT token in the Authorization header of incoming HTTP requests.
This authentication strategy also adds cds.context.user.authInfo.
To allow forwarding to remote services, JWT tokens issued by IAS service don't contain authorization information. In particular, no scopes are included. Closing this gap is up to you as application developer.
Prerequisites: You need to add @sap/xssec to your project:
npm add @sap/xssecConfiguration: Choose this strategy as follows:
"cds": {
  "requires": {
    "auth": "ias"
  }
}
Token Validation
For tokens issued by SAP Cloud Identity Service, @sap/xssec offers two additional validations: (1) token ownership via x5t thumbprint and (2) proof-of-possession. These validations are enabled by default for requests to the app's cert route (.cert segment in the domain).
The default behavior can be overwritten using additional configuration as follows:
"requires": {
  "auth": {
    "kind": "ias",
    "config": { // passed to @sap/xssec as is
      "validation": {
        "x5t": { "enabled": false },
        "proofToken": { "enabled": false }
      }
    }
  }
}
Please see @sap/xssec documentation for more details.
XSUAA Fallback
To ease your migration from XSUAA-based to IAS-based authentication, the ias strategy automatically supports tokens issued by XSUAA when you provide the necessary credentials at cds.env.requires.xsuaa.credentials.
For standard bindings, add xsuaa to the list of required services as follows:
"requires": {
  "auth": "ias", //> as above
  "xsuaa": true
}
In case additional configuration is necessary, you can also provide an object:
"requires": {
  "xsuaa": {
    "config": { // passed to @sap/xssec as is
      [...]
    }
  }
}
Custom Authentication
You can configure an own implementation by specifying an own impl as follows:
"requires": {
  "auth": {
    "impl": "srv/custom-auth.js" // > relative path from project root
  }
}
Essentially, custom authentication middlewares must do two things:
First, they must fulfill the cds.context.user contract by assigning an instance of cds.User or a look-alike to the continuation of the incoming request at cds.context.user.
Second, if running in a multitenant environment, cds.context.tenant must be set to a string identifying the tenant that is addressed by the incoming request.
module.exports = function custom_auth (req, res, next) {
  // do your custom authentication
  cds.context.user = new cds.User({
    id: '<user-id>',
    roles: ['<role-a>', '<role-b>'],
    attr: {
      <user-attribute-a>: '<value>',
      <user-attribute-b>: '<value>'
    }
  })
  cds.context.tenant = '<tenant>'
}
The TypeScript equivalent has to use the default export.
import cds from "@sap/cds";
import {Request, Response, NextFunction} from "express";
type Req = Request & { user: cds.User, tenant: string };

export default function custom_auth(req: Req, res: Response, next: NextFunction) {
  // do your custom authentication ...
}
Learn more about customizing the user ID in this example.
Authentication in Production
Enforced by Default
In a productive scenario with an authentication strategy configured, for example the default jwt, all CAP service endpoints are authenticated by default, regardless of the authorization model. That is, all services without @restrict or @requires implicitly get @requires: 'authenticated-user'.
This can be disabled via feature flag cds.requires.auth.restrict_all_services: false, or by using mocked authentication explicitly in production.
Cached by Default
@sap/xssec^4.8 provides a way to improve latency on subsequent requests with the same token by introducing two caches for CPU-intensive operations:
- Signature cache: This cache handles the cryptographic signature validation of a JWT token.
- Token decode cache: This cache manages the base64-decoding of a JWT token.
Both caches are enabled by default.
The signature cache can be configured or deactivated via cds.requires.auth.config (which is passed through to @sap/xssec).
Learn more about signature cache and its configuration..learn-more}
The token decode cache, on the other hand, can only be configured programmatically during bootstrapping, for example in a custom server.js file, as follows:
require('@sap/xssec').Token.enableDecodeCache(config?)and deactivated via
require('@sap/xssec').Token.decodeCache = falseLearn more about caching CPU intensive operations in @sap/xssec
Authentication in Hybrid Setup
with XSUAA
The following steps assume you've set up the Cloud Foundry Command Line Interface.
Log in to Cloud Foundry:
shcf l -a <api-endpoint>If you don't know the API endpoint, refer to Regions and API Endpoints Available for the Cloud Foundry Environment.
Go to the project you have created in Getting started in a Nutshell.
Configure the Application
Configure your app for XSUAA-based authentication if not done yet:
shcds add xsuaa --for hybridThis command creates the XSUAA configuration file
xs-security.jsonand adds the service and required dependencies to yourpackage.jsonfile.Make sure
xsappnameis configured andtenant-modeis set todedicatedinxs-security.jsonfile:json{ "xsappname": "bookshop-hybrid", "tenant-mode": "dedicated", ... }Configure the redirect URI:
Add the following OAuth configuration to the
xs-security.jsonfile:json"oauth2-configuration": { "redirect-uris": [ "http://localhost:5000/login/callback" ] }Create an XSUAA service instance with this configuration:
shcf create-service xsuaa application bookshop-uaa -c xs-security.jsonLater on, if you've changed the scopes, you can use
cf update-service bookshop-uaa -c xs-security.jsonto update the configuration.Tip
This step is necessary for locally running apps and for apps deployed on Cloud Foundry.
Create a service key:
shcf create-service-key bookshop-uaa bookshop-uaa-keyThis lets you gain access to the XSUAA credentials from your local application.
Bind to the new service key:
shcds bind -2 bookshop-uaaThis adds an
authsection containing the binding and the kindxsuaato the .cdsrc-private.json file. This file is created if it doesn't exist and keeps the local and private settings of your app:json{ "requires": { "[hybrid]": { "auth": { "kind": "xsuaa", "binding": { ... } } } } }If your running in BAS, you can alternatively create a new run configuration, connecting the
authto your XSUAA service instance.In that case you need to add the environment variable
cds_requires_auth_kind=xsuaato the run configuration.Check authentication configuration:
shcds env list requires.auth --resolve-bindings --profile hybridThis prints the full
authconfiguration including the credentials.
Set Up the Roles for the Application
By creating a service instance of the xsuaa service, all the roles from the xs-security.json file are added to your subaccount. Next, you create a role collection that assigns these roles to your users.
Open the SAP BTP Cockpit.
For your trial account, this is: https://cockpit.hanatrial.ondemand.com
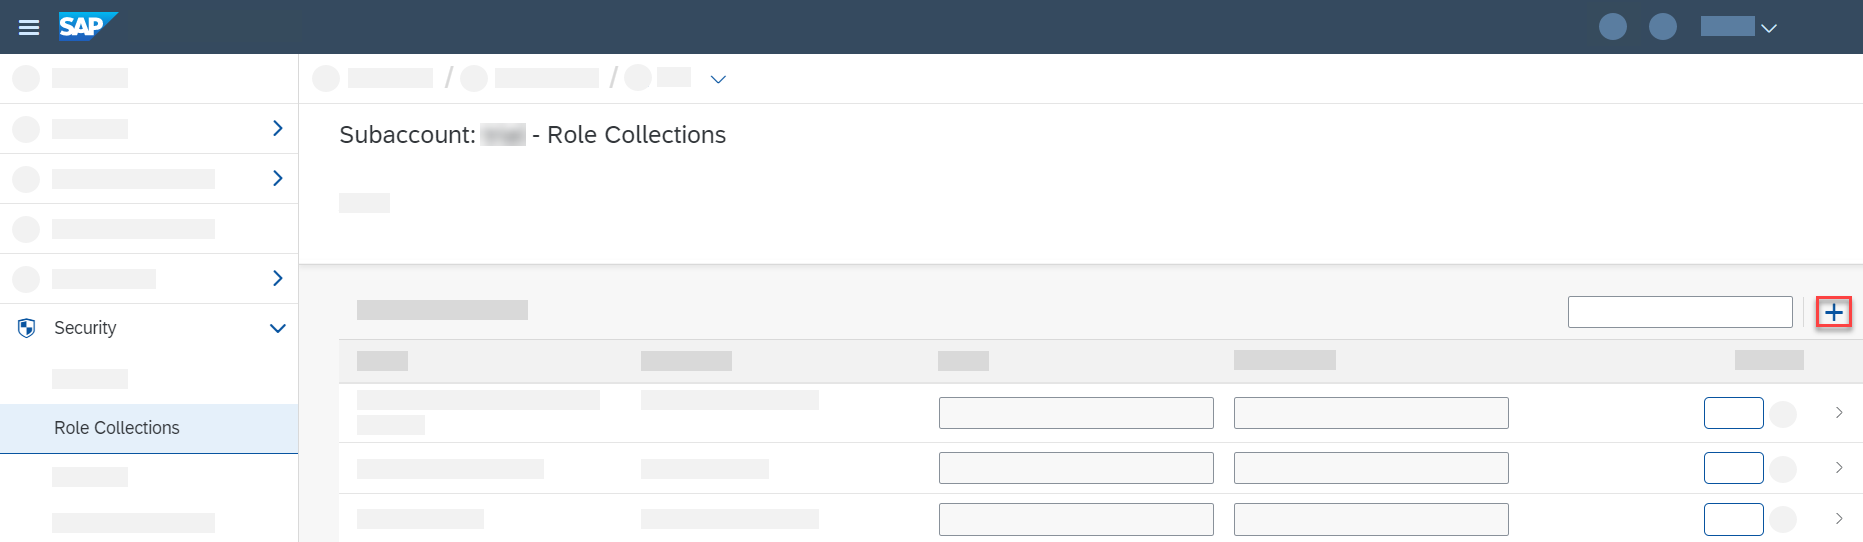
Navigate to your subaccount and then choose Security > Role Collections.
Choose Create New Role Collection:
Enter a Name for the role collection, for example
BookshopAdmin, and choose Create.Choose your new role collection to open it and switch to Edit mode.
Add the
adminrole for your bookshop application (application idbookshop!a<XXXX>) to the Roles list.Add the email addresses for your users to the Users list.
Choose Save
Running App Router
The App Router component implements the necessary authentication flow with XSUAA to let the user log in interactively. The resulting JWT token is sent to the application where it's used to enforce authorization and check the user's roles.
Add App Router to the
appfolder of your project:shcds add approuterInstall
npmpackages for App Router:shnpm install --prefix app/routerIn your project folder run:
shcds bind --exec -- npm start --prefix app/routercmdcds bind --exec -- npm start --prefix app/routerpowershellcds bind --exec '--' npm start --prefix app/routerLearn more about
cds bind --exec.This starts an App Router instance on http://localhost:5000 with the credentials for the XSUAA service that you have bound using
cds bind.Usually the App Router is started using
npm startin theappfolder. But you need to provide theVCAP_SERVICESvariable with the XSUAA credentials. With thecds bind --execcommand you can launch an arbitrary command with theVCAP_SERVICESvariable filled with yourcds bindservice bindings.Since it only serves static files or delegates to the backend service, you can keep the server running. It doesn't need to be restarted after you have changed files.
Make sure that your CAP application is running as well with the
hybridprofile:shcds watch --profile hybridIf you are using BAS Run Configurations, you need to configure
cds watchwith profilehybrid:- Open the context menu for your run configuration.
- Choose Show in File.
- Change the command
args:
json"args": [ "cds", "watch", "--profile", "hybrid" ],After the App Router and CAP application are started, log in at http://localhost:5000 and verify that the routes are protected as expected.
In our example, if you assigned the
adminscope to your user in SAP BTP cockpit, you can now access the admin service at http://localhost:5000/admin.To test UIs w/o a running UAA service, just add this to app/router/xs-app.json:
"authenticationMethod": "none"
SAP Business Application Studio:
The login fails pointing to the correct OAuth configuration URL that is expected.
Replace the URL
http://localhost:5000/in yourxs-security.jsonfile with the full URL from the error message:json"oauth2-configuration": { "redirect-uris": [ "<url from error message>" ] }Warning
This is a specific configuration for your dev space and should not be submitted or shared.
Update the XSUAA service:
shcf update-service bookshop-uaa -c xs-security.jsonRetry
with IAS
Configure the Application
Add a deployment descriptor, if there is none in the root of your project:
shcds add mtaEnable IAS authentication for your application by adding and installing the
amsplugin:shcds add ams npm installThis command installs
amsandiasplugins, adds the required dependencies topackage.jsonand updatesmta.yaml.Learn more about Adding AMS Support and Adding IAS.
Generate roles and policies with AMS:
shcds build --for amsThis compiles the CDS annotations into DCL files.
Add App Router for fetching the IAS token:
shcds add approuterThis configures the local App Router callback URI for the
identityserviceIn mta.yaml, this entry should now be present:
yaml- name: bookshop-ias [...] parameters: service: identity [...] config: display-name: bookshop oauth2-configuration: redirect-uris: - http://localhost:5000/login/callback?authType=ias post-logout-redirect-uris: - ~{app-api/app-protocol}://~{app-api/app-uri}/*/logout.htmlInstall
npmpackages for App Router:shnpm install --prefix app/router
Deploy the Application
Log in to Cloud Foundry:
shcf l -a <api-endpoint>If you don't know the API endpoint, refer to Regions and API Endpoints Available for the Cloud Foundry Environment.
Pack and deploy the application:
shcds up
Assign Policies in the Administrative Console
Log in to your Administrative Console for IAS and go to
Applications & Resources.Assign policies to IAS users or create custom policies, see Cloud Deployment.
Start Hybrid Testing
Bind your local application to the Identity Service Instance:
shcds bind -2 bookshop-iasThis generates the .cdsrc-private.json
json{ "requires": { "[hybrid]": { "auth": { "binding": { "type": "cf", "apiEndpoint": "https://...", "org": "cdx-nodejs", "space": "dev", "instance": "bookshop-ias", "key": "bookshop-ias-key" }, "kind": "ias-auth", "vcap": { "name": "auth" } } } } }In your project folder run:
shcds bind --exec -- npm start --prefix app/routercmdcds bind --exec -- npm start --prefix app/routerpowershellcds bind --exec '--' npm start --prefix app/routerLearn more about
cds bind --exec.This starts an App Router instance on http://localhost:5000 with the credentials for the IAS service that you have bound using
cds bind.Since it only serves static files or delegates to the backend service, you can keep the server running. It doesn't need to be restarted after you have changed files.
Make sure that your CAP application is running as well with the
hybridprofile:shcds watch --profile hybridAfter the App Router and CAP application are started, log in at http://localhost:5000 and verify that the routes are protected as expected.