Deploy to Cloud Foundry
A comprehensive guide on deploying applications built with SAP Cloud Application Programming Model (CAP) to SAP BTP Cloud Foundry environment.
Intro & Overview
After completing the functional implementation of your CAP application by following the Getting Started or Cookbook guides, you would finally deploy it to the cloud for production. The essential steps are illustrated in the following graphic:

First, you apply these steps manually in an ad-hoc deployment, as described in this guide. Then, after successful deployment, you automate them using CI/CD pipelines.
This guide is available for Node.js and Java.
Use the toggle in the title bar or press v to switch.
Prerequisites
The following sections are based on a new project that you can create like this:
cds init bookshop --add sample
cd bookshop
Alternatively, download or clone the sample repository
Exercise the following steps in the bookshop subfolder of the cloud-cap-samples repo:
git clone https://github.com/sap-samples/cloud-cap-samples samples
cd samples/bookshopcds init bookshop --java --add sample
cd bookshopIf you want to use a ready-to-be-deployed sample, see our java/samples.
In addition, you need to prepare the following:
1. SAP BTP with SAP HANA Cloud Database Up and Running
- Access to SAP BTP, for example a trial
- An SAP HANA Cloud database running in your subaccount
- Entitlement for
hdi-sharedservice plan for your subaccount - A Cloud Foundry space
Starting the SAP HANA database takes several minutes
Therefore, we recommend doing these steps early on. In trial accounts, you need to start the database every day.
2. Latest Versions of @sap/cds-dk
Ensure you have the latest version of @sap/cds-dk installed globally:
npm -g outdated       #> check whether @sap/cds-dk is listed
npm i -g @sap/cds-dk  #> if necessary
Likewise, ensure the latest version of @sap/cds is installed in your project:
npm outdated          #> check whether @sap/cds is listed
npm i @sap/cds        #> if necessary
3. Cloud MTA Build Tool
Run
mbtin a terminal to check whether you've installed it.If not, install it according to the MTA Build Tool's documentation.
For macOS/Linux machines best is to install using
npm:shnpm i -g mbtFor Windows, please also install
GNU Make.
4. Cloud Foundry CLI w/ MTA Plugins
Run
cf -vin a terminal to check whether you've installed version 8 or higher.If not, install or update it according to the Cloud Foundry CLI documentation.
In addition, ensure to have the MTA plugin for the Cloud Foundry CLI installed.
shcf add-plugin-repo CF-Community https://plugins.cloudfoundry.org cf install-plugin -f multiapps cf install-plugin -f html5-plugin
Prepare for Production
If you followed CAP's grow-as-you-go approach, you've developed your application with an in-memory database and basic (mocked) authentication. In the cloud, you typically use production-grade services like SAP HANA and authentication providers.
The cds add <facets> command ensures required services are configured correctly and their dependencies are added to your package.json.
1. SAP HANA Database
While we used SQLite as a low-cost stand-in during development, we're using an SAP HANA Cloud database for production:
While we used SQLite or H2 as a low-cost stand-in during development, we're going to use an SAP HANA Cloud database for production:
cds add hanaLearn more about using SAP HANA for production.
2. Authorization/Authentication
Configure your app for XSUAA-based authentication:
cds add xsuaaThis will also generate an xs-security.json file
The roles/scopes are derived from authorization-related annotations in your CDS models. Ensure to rerun cds compile --to xsuaa, as documented in the Authorization guide whenever there are changes to these annotations.
Learn more about SAP Authorization and Trust Management/XSUAA.
3. MTA-Based Deployment
We'll be using the Cloud MTA Build Tool to execute the deployment. The modules and services are configured in an mta.yaml deployment descriptor file, which we generate with:
cds add mtaLearn more about MTA-based deployment.
4. App Router as Gateway
The App Router acts as a single point-of-entry gateway to route requests to. In particular, it ensures user login and authentication in combination with XSUAA.
Two deployment options are available:
Managed App Router: for SAP Build Work Zone, the Managed App Router provided by SAP Fiori Launchpad is available.
Custom App Router: for custom scenarios without SAP Fiori Launchpad, the App Router needs to be deployed along with your application. In this case, use the following command to enhance the application configuration:
shcds add approuter
Learn more about the SAP BTP Application Router.
5. User Interfaces
Option A: SAP Cloud Portal
If you intend to deploy user interface applications, you also need to set up the HTML5 Application Repository in combination with the SAP Cloud Portal service:
cds add portalOption B: SAP Build Work Zone, Standard Edition beta
For single-tenant applications, you can use SAP Build Work Zone, Standard Edition:
cds add workzoneImportant: This also requires you to set up SAP Build Work Zone, Standard Edition according to the SAP Learning tutorial.
6. Optional: Multitenancy
To enable multitenancy for production, run the following command:
cds add multitenancyLearn more about MTX services.
You're set!
The previous steps are required only once in a project's lifetime. With that done, we can repeatedly deploy the application.
Build and Deploy
Make sure you are logged in to Cloud Foundry and target the space you want to deploy to:
cf login --sso  # to log on with SAP Universal ID
cf targetPrevent outdated lock file issues
If your project already includes a package-lock.json, run npm update to make sure it’s in sync with your package.json before proceeding.
You can now freeze dependencies, build, and deploy the application:
cds upEssentially, this automates the following steps...
# Installing app dependencies, e.g.
npm i app/browse
npm i app/admin-books

# If project is monorepo
ln -sf ../package-lock.json

# If project is multitenant
npm i --package-lock-only --prefix mtx/sidecar

# If package-lock.json doesn't exist
npm i --package-lock-only

# Final assembly and deployment...
mbt build -t gen --mtar mta.tar
cf deploy gen/mta.tar -f
Test with cds build
While cds build is already ran as part of mbt build in cds up, you can also run it standalone to inspect what is generated for production:
cds build --productionGot errors? See the troubleshooting guide.Learn how to reduce the MTA archive size during development.
This process can take some minutes and finally logs an output like this:
[…]
Application "bookshop" started and available at
"[org]-[space]-bookshop.<landscape-domain>.com"
[…]
You can use this URL to access the approuter as the entry point of your application.
For multitenant applications, you have to subscribe a tenant first. The application is accessible via a tenant-specific URL after subscription.
No index page and SAP Fiori preview in the cloud
The default index page and SAP Fiori preview, that you are used to seeing during local development, are only meant for the development profile and not available in the cloud. For productive applications, you should add a proper SAP Fiori elements application through on of the user interface options outlined before.
Inspect Apps in BTP Cockpit
Visit the "Applications" section in your SAP BTP cockpit to see the deployed apps:
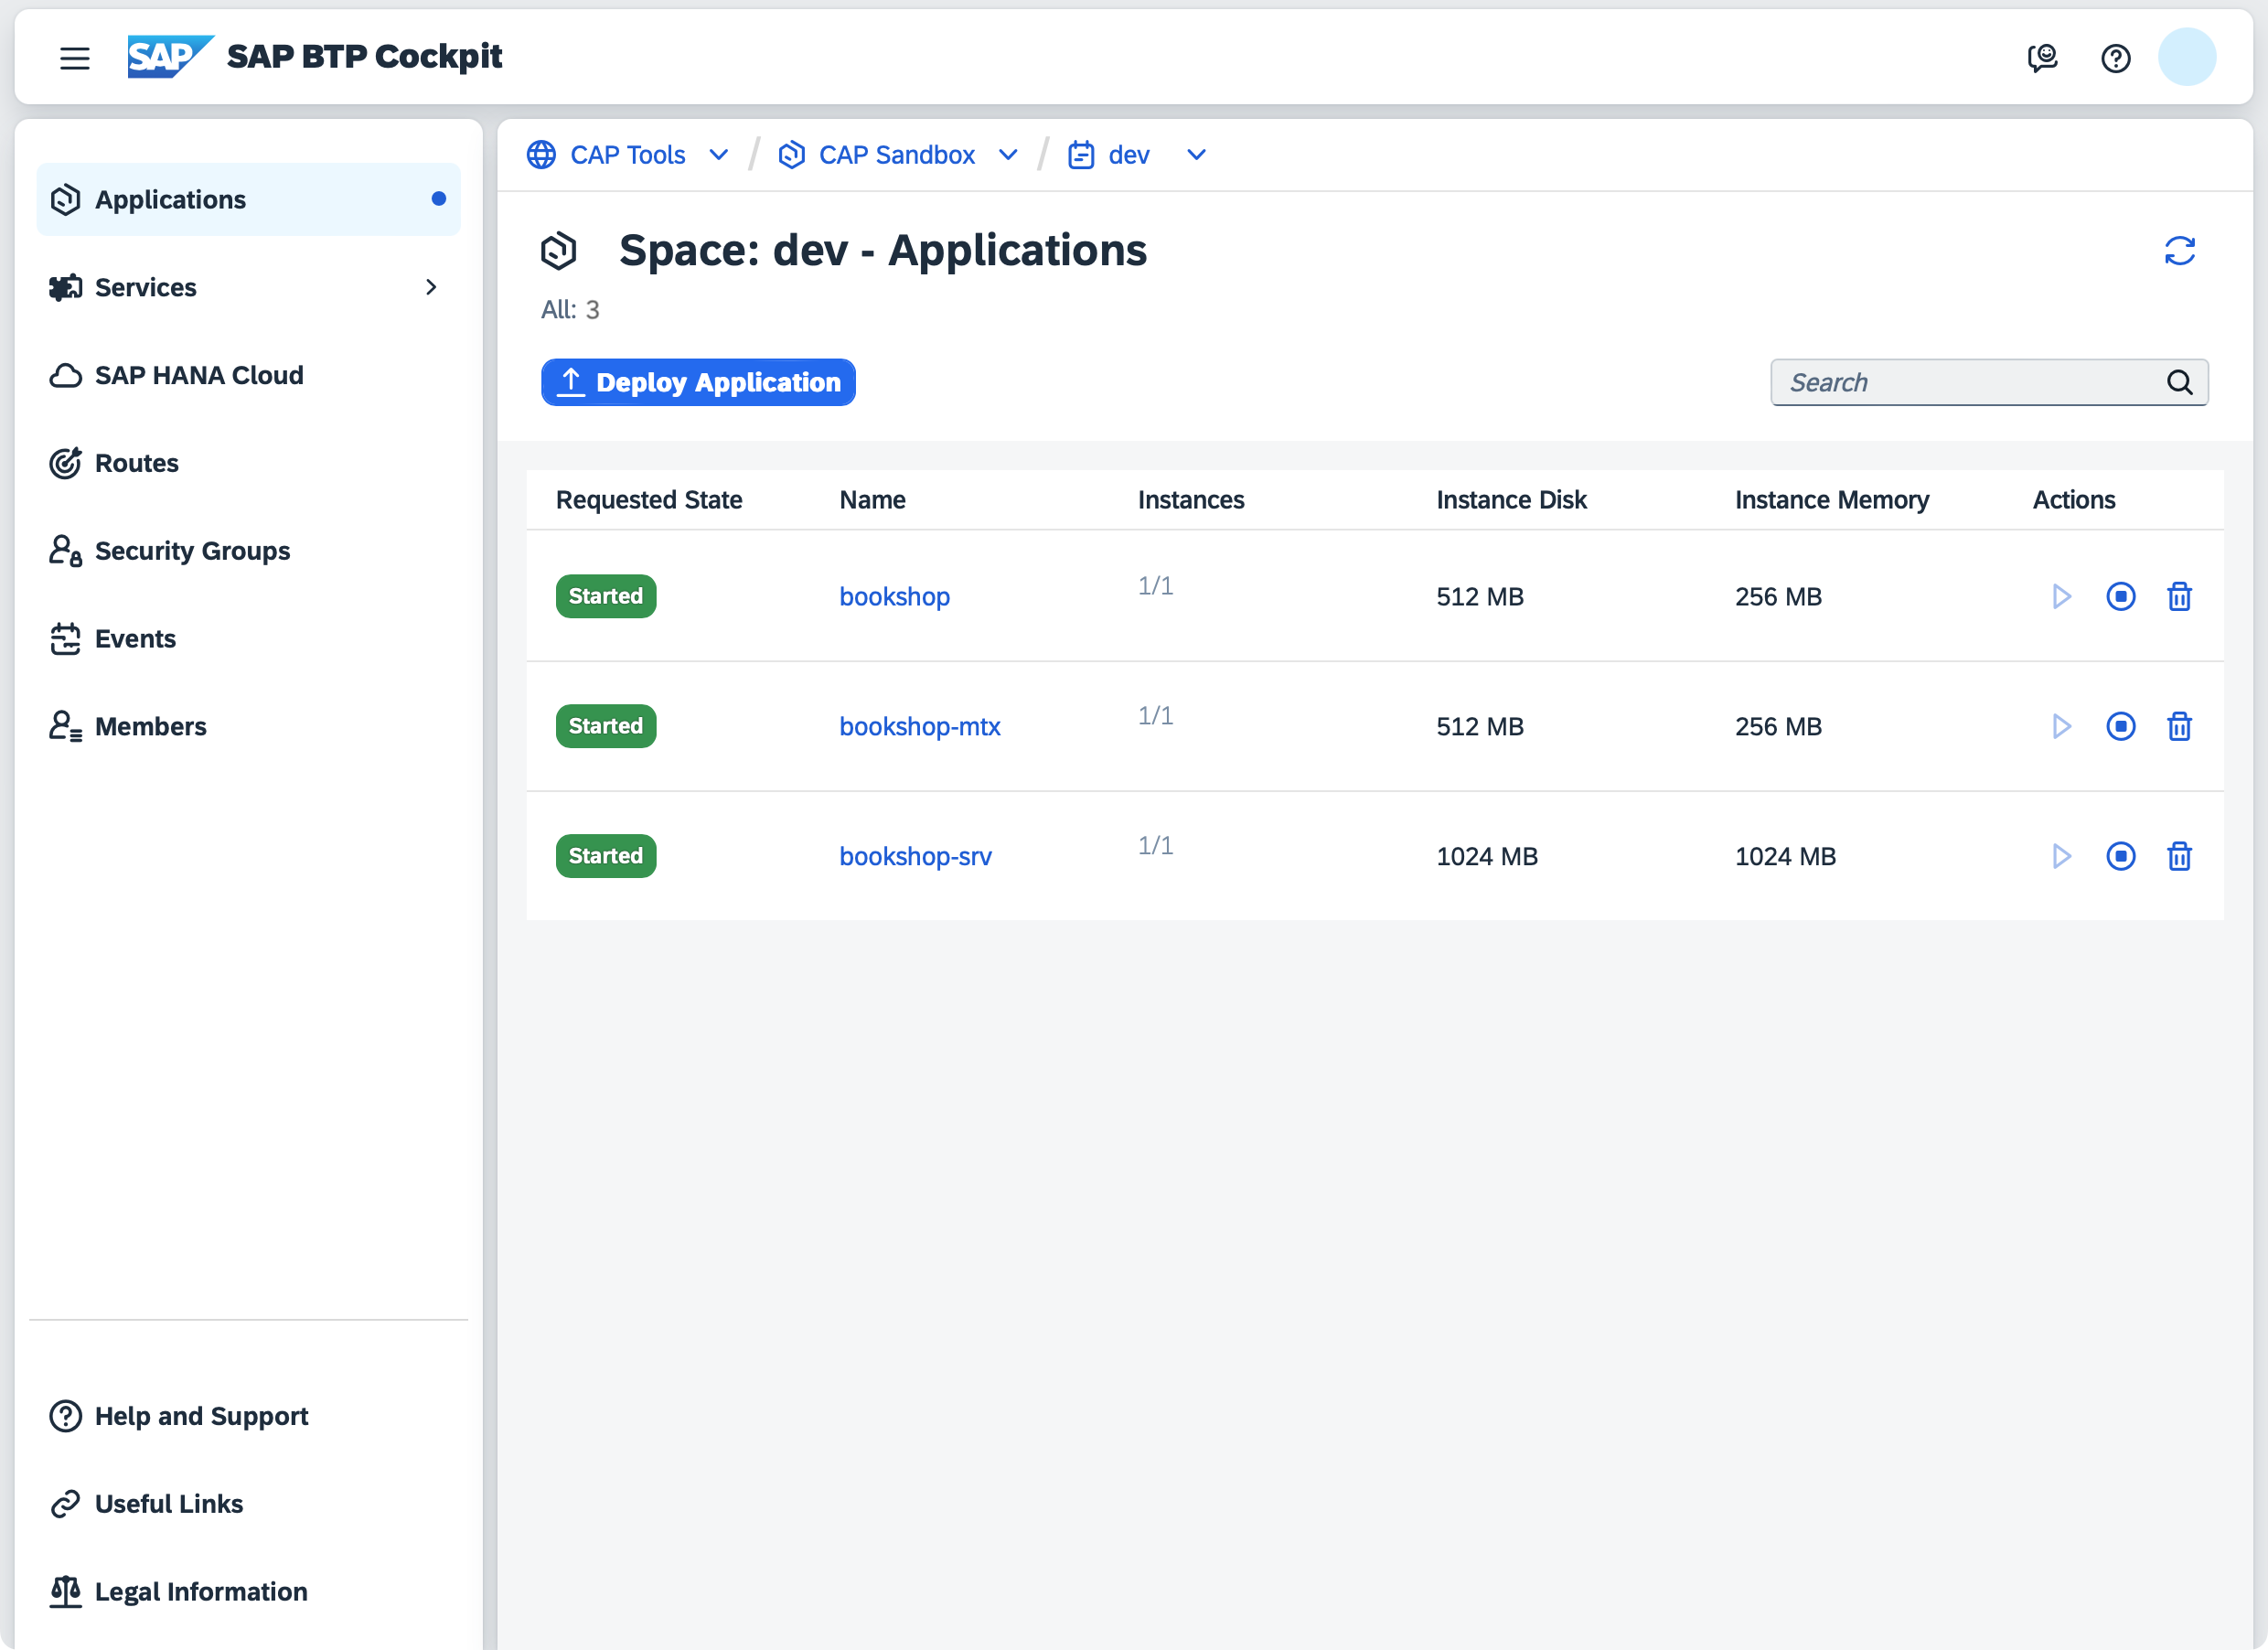
Next up: Assign the admin role
In order to access the admin APIs you need to assign the admin role required by AdminService. Create a role collection and assign the role and your user to get access.
Got errors? See the troubleshooting guide.
Keep Dependencies Up-to-date
Deployed applications should freeze all their dependencies, including transient ones. Therefore, on first execution, cds up creates a package-lock.json file for all application modules.
It is essential to regularly update dependencies to consume latest bug fixes and improvements. Not doing so will increase the risk of security vulnerabilities, expose your application to known bugs, and make future upgrades significantly harder and more time-consuming.
We recommend setting up Dependabot, Renovate or similar automated solutions to update dependencies one-by-one to easily identify breaking changes, minimize risks, and ensure continuous compatibility and stability of your application.
Upgrade Tenants
The CAP Java SDK offers main methods for Subscribe/Unsubscribe in the classes com.sap.cds.framework.spring.utils.Subscribe/Unsubscribe that can be called from the command line. This way, you can run the tenant subscribe/unsubscribe for the specified tenant. This would trigger also your custom handlers, which is useful for the local testing scenarios.
In order to register all handlers of the application properly during the execution of a tenant operation main method, the component scan package must be configured. To set the component scan, the property cds.multitenancy.component-scan must be set to the package name of your application.
The handler registration provides additional information that is used for the tenant subscribe, for example, messaging subscriptions that are created.
The MTX sidecar must be running
You can stop the CAP Java backend when you call this method, but the MTX sidecar application must be running!
This synchronization can also be automated, for example using Cloud Foundry Tasks on SAP BTP and Module Hooks in your MTA.
The main method optionally takes tenant ID (string) as the first input argument and tenant options (JSON string) as the second input argument. Alternatively, you can use the environment variables MTCOMMAND_TENANTS and MTCOMMAND_OPTIONS instead of arguments. The command-line arguments have higher priority, so you can use them to override the environment variables.
The method returns the following exit codes.
| Exit Code | Result |
|---|---|
| 0 | Tenant subscribed/unsubscribed successfully. |
| 3 | Failed to subscribe/unsubscribe the tenant. Rerun the procedure to make sure the tenant is subscribed/unsubscribed. |
To run this method locally, use the following command where <jar-file> is the one of your applications:
java -cp <jar-file> -Dloader.main=com.sap.cds.framework.spring.utils.Subscribe/Unsubscribe org.springframework.boot.loader.launch.PropertiesLauncher <tenant> [<tenant options>]java -cp <jar-file> -Dloader.main=com.sap.cds.framework.spring.utils.Subscribe/Unsubscribe org.springframework.boot.loader.PropertiesLauncher <tenant> [<tenant options>]In the SAP BTP, Cloud Foundry environment, it can be tricky to construct such a command. The reason is that the JAR file is extracted by the Java buildpack and the place of the Java executable isn't easy to determine. Also the place differs for different Java versions. Therefore, we recommend adapting the start command that is generated by the buildpack and run the adapted command:
sed -i 's/org.springframework.boot.loader.launch.JarLauncher/org.springframework.boot.loader.launch.PropertiesLauncher/g' /home/vcap/staging_info.yml && sed -i 's/-Dsun.net.inetaddr.negative.ttl=0/-Dsun.net.inetaddr.negative.ttl=0 -Dloader.main=com.sap.cds.framework.spring.utils.Subscribe/Unsubscribe/g' /home/vcap/staging_info.yml && jq -r .start_command /home/vcap/staging_info.yml | sed 's/^/ MTCOMMAND_TENANTS=my-tenant [MTCOMMAND_TENANTS=<tenant options>]/' | bashsed -i 's/org.springframework.boot.loader.JarLauncher/org.springframework.boot.loader.PropertiesLauncher/g' /home/vcap/staging_info.yml && sed -i 's/-Dsun.net.inetaddr.negative.ttl=0/-Dsun.net.inetaddr.negative.ttl=0 -Dloader.main=com.sap.cds.framework.spring.utils.Subscribe/Unsubscribe/g' /home/vcap/staging_info.yml && jq -r .start_command /home/vcap/staging_info.yml | sed 's/^/ MTCOMMAND_TENANTS=my-tenant [MTCOMMAND_TENANTS=<tenant options>]/' | bashsed -i 's/org.springframework.boot.loader.JarLauncher/-Dloader.main=com.sap.cds.framework.spring.utils.Subscribe/Unsubscribe org.springframework.boot.loader.PropertiesLauncher/g' /home/vcap/staging_info.yml && jq -r .start_command /home/vcap/staging_info.yml | sed 's/^/ MTCOMMAND_TENANTS=my-tenant [MTCOMMAND_TENANTS=<tenant options>]/' | bash